190 Wio: wioMainMenu (190.html)

Keywords

WioIXkb py "Enter key" "190 Wio: wioMainMenu (190.html)" WioTerminal SeeedStudio ICH180RR D@CC Raspberry-Pi-Compatible MicroPython uSD MicroPython .def uJoyStick Raspberry Pi setClock "improvised function" "Unix Time" "Unix Epoch" media/rtc inputWto typing_3.mp3 typing_3_mp3.txt wioMainMenu incharWto "IX Functions Python List" inputWto LoRa "Edge Impulse" "Standby Power Generators" Propane "Dual Fuel" inverters "Chassis Battery" Tinkercad "3D Printer" Grove SHT31 TMP102 Geppetto PiR2W PiR2DrawK12 PiR2DrawK12.odg LPG Firman T08072 Standby Generator "Standby Generator" Tri-Fuel "Tri Fuel" Propane NG HomeDepot "Home Depot"

(To enlarge .....Click it)
thumb: IXimage.jpg
IX or (IX by DC) or "|><"


This article is a part of the IX family of software.

wioMainMenu

(To enlarge .....Click it)
thumb: IMG_5049.jpg

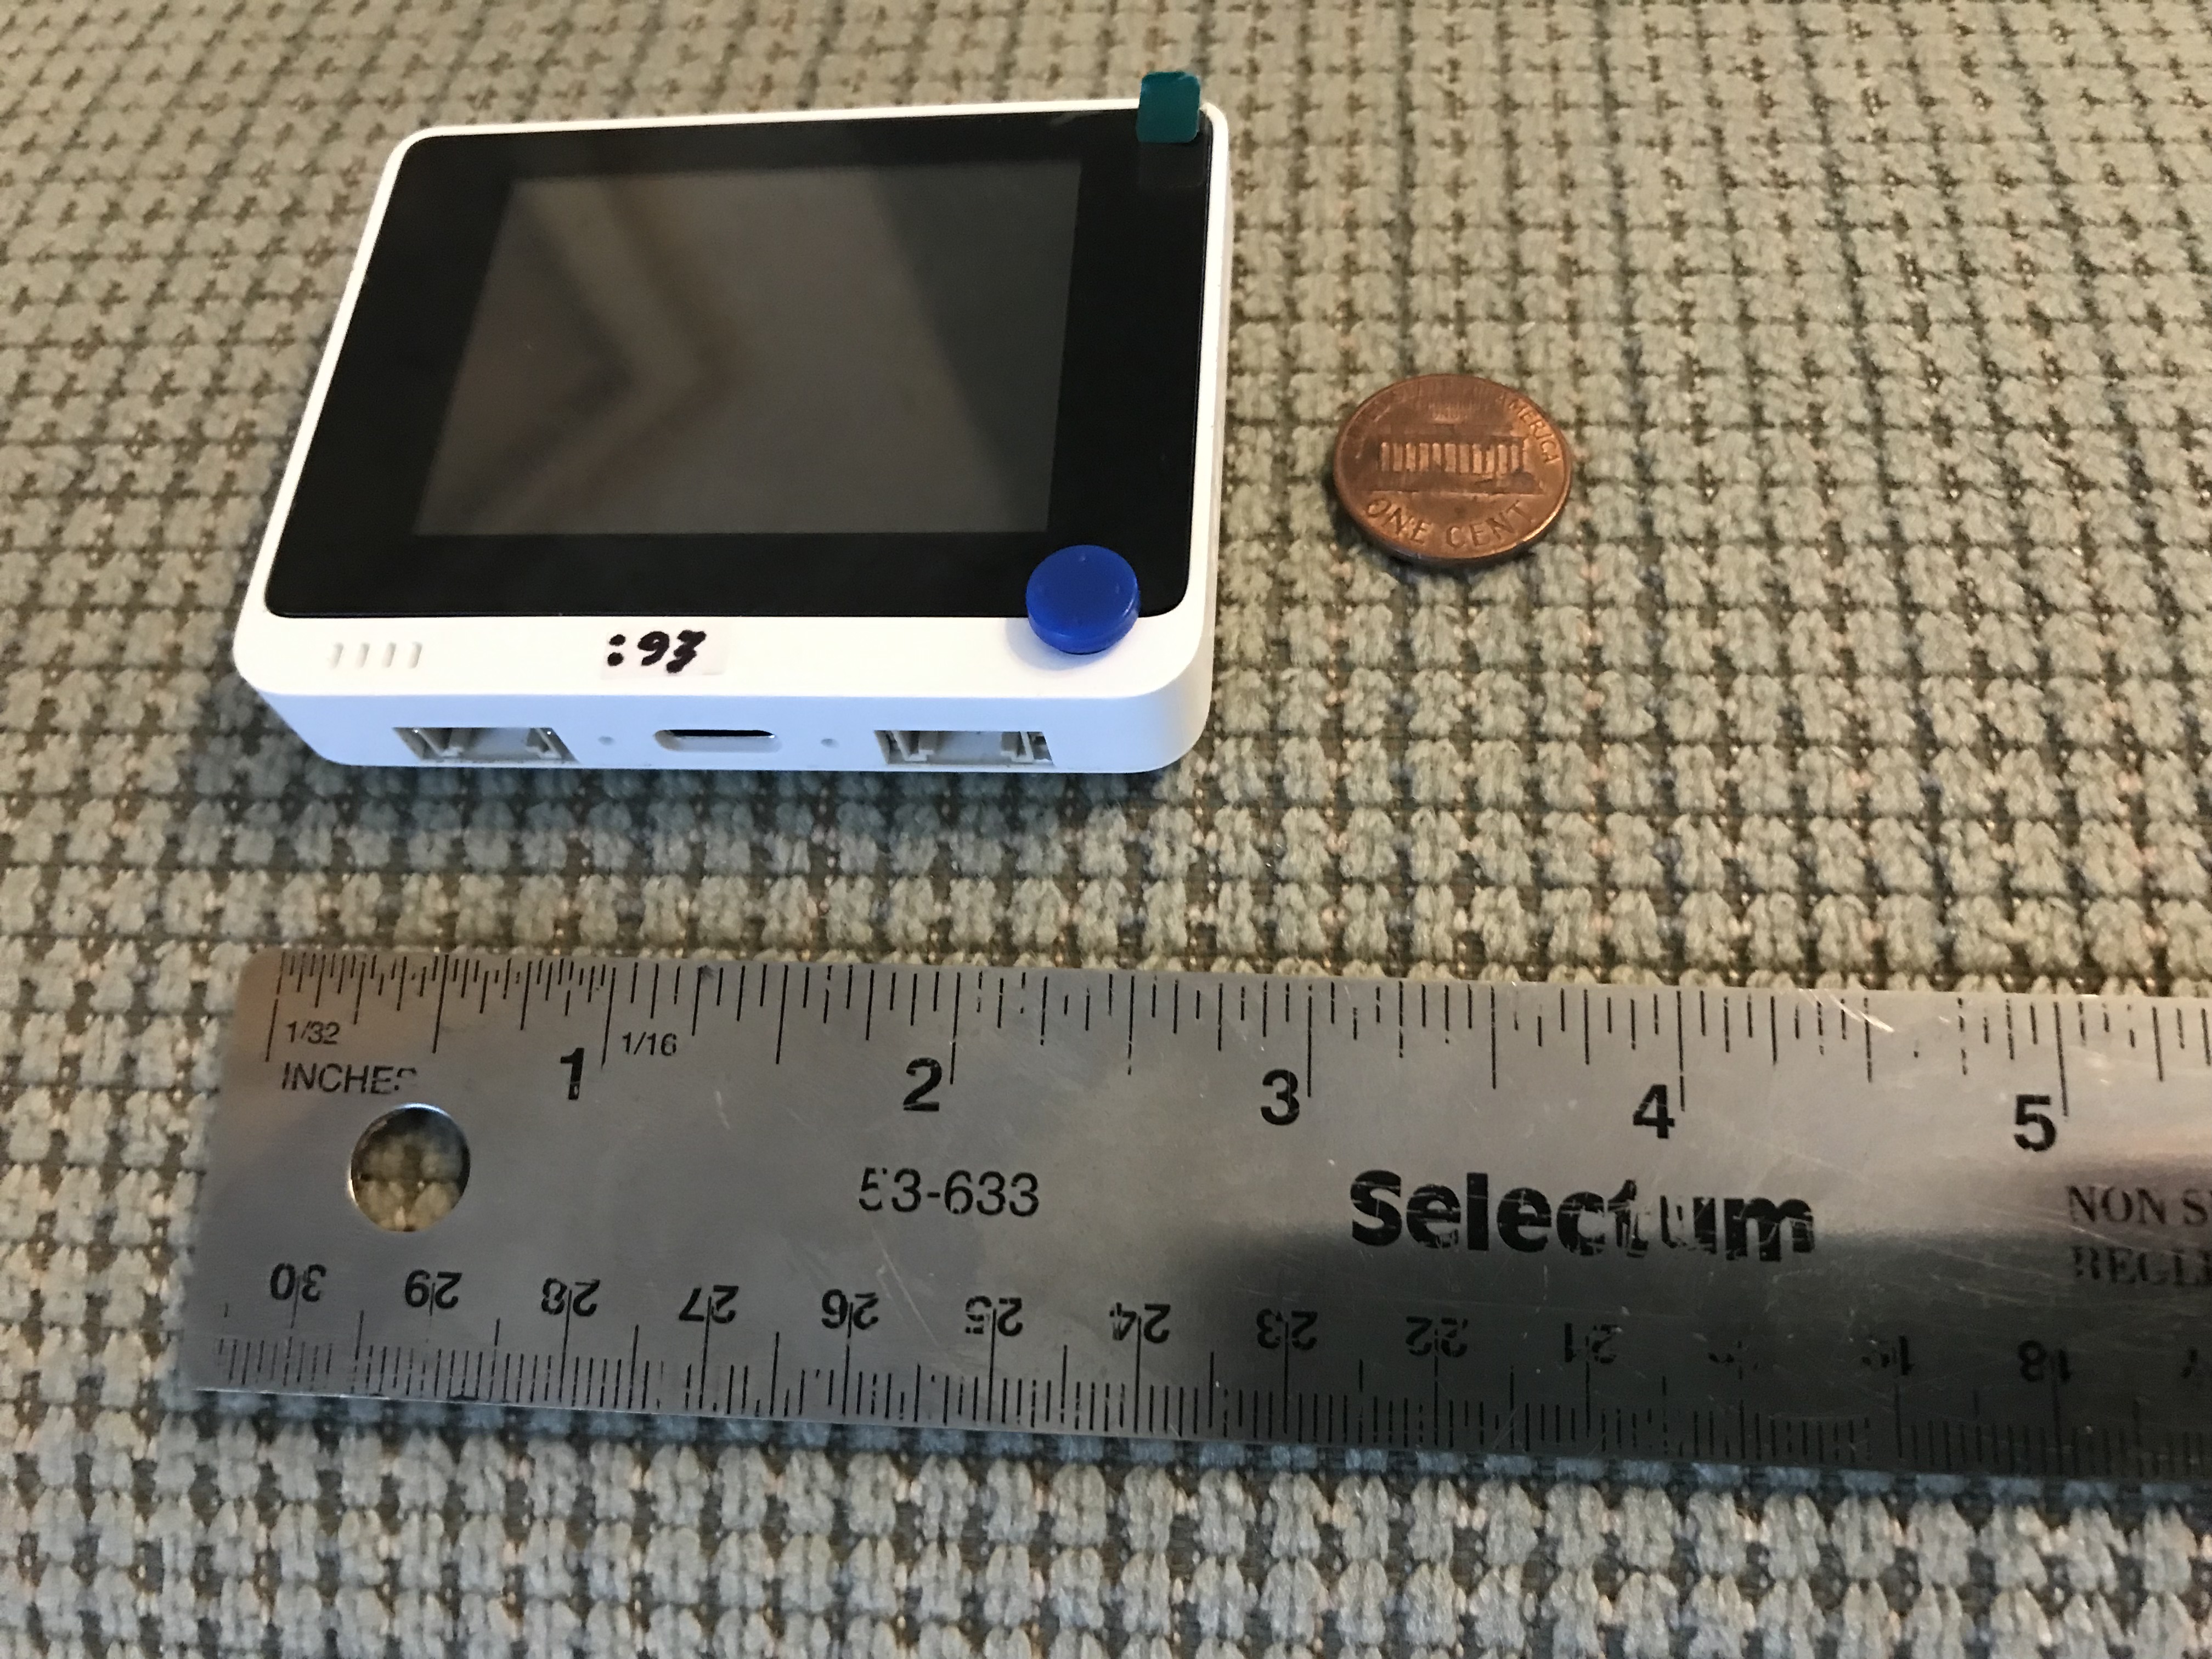
The tiny Wio Terminal

(To enlarge .....Click it)
thumb: IMG_5098.jpg

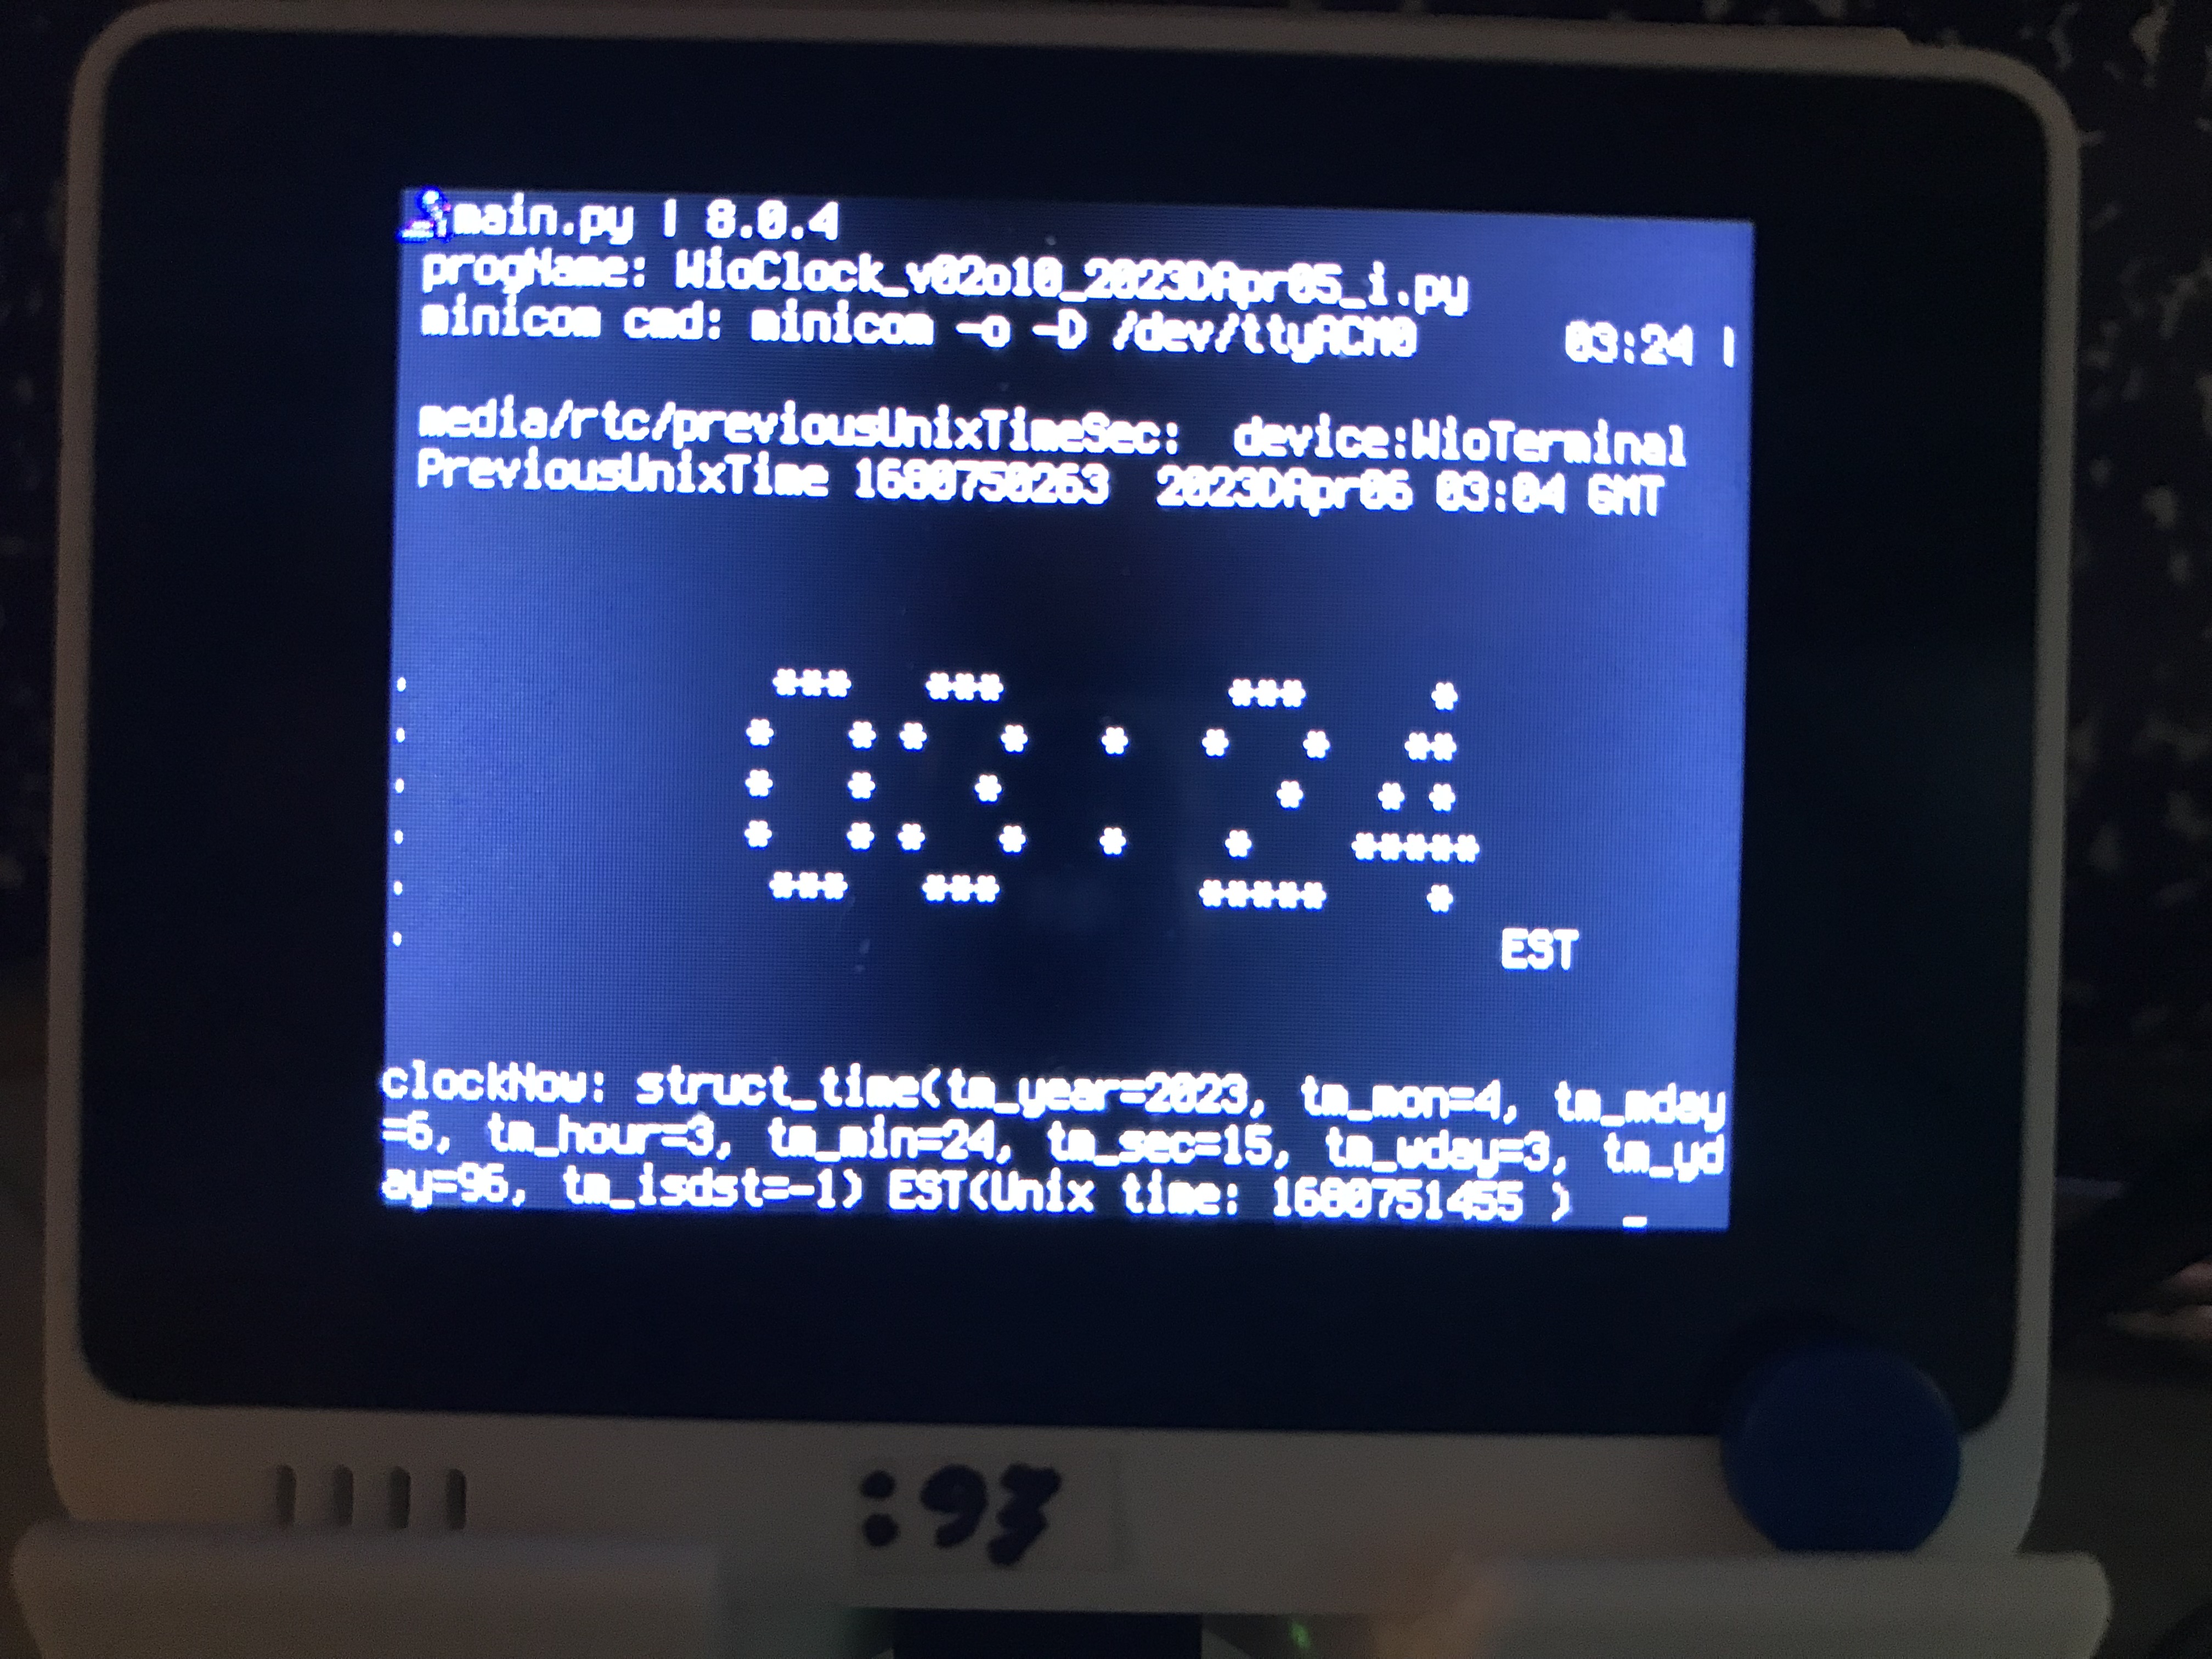
WioTerminal with wioClock.py v2o11

The wioMainMenu is the main program that will start up when the Wio Terminal boots up. The main job of this program is to invoke any programs that it can pass control to. There are 2 main issues. The method of invocation is by calling "improvised functions" that have been "included" when the wioMainMenu was created. It would simplify things if the programmer creating the main program were not forced to continually update the main program as additional programs are written for use on the WioTerminal. The only Python (.py) program that can be invoked directly is the one called "main.py." This article described how these difficulties are addressed.

Table of Contents

Wio: wioMainMenu (190.html)
Table of Contents
wioMainMenu 
Introduction              
  Quick Wiki for the User of the wioMainMenu              
  Info for the Users Who Are Programmers
Waiting for Keyboard input
Splash Screen for wioMainMenu
Characters (Spelling) Using The Top 3 Buttons
Invoking The inCharWto Function
The Function Named "requires"
Using MicroPython on the Wio Terminal
MicroPython and the uSD Card ( uSDcard ) 
[ The author is moving the remainder of this article to Article 191 ] 
Grove - Temp & Humidity Sensor ( SHT31 )
My Many PiR2D-like Devices and PiR2W (fut)
The Adafruit 4132 board: GPIO Expander Bonnet
Orientation of the 3 LEDs
PiR2D3 Schematic for the WeatherHat Pro
Other Related Thoughts
Conclusion
End of Article
Sources

Introduction

This is the beginning of my documentation for the wioMainMenu.

When the WioTerminal boots up, a wioMainMenu splash screen will appear on the LCD screen. This splash screen will display on the left-hand side a brief menu that initially displays only the names of two programs that can be run. The name of this first program is "helpMain_i.py". Other programs will become available as time passes. Notably, wioClock is already available. But the only names displayed are "helpMain_i.py" and "wioClock_i.py" with "<D<U<E" to the left of the first name. This "E" refers to one of the 5 switches that form the compound uJoyStick switch. Nearby on the screen is a diagram of the "Letter Combinations" for the uJoyStick:

                          U                             Up
                         LER                    Left  Enter  Right
                          D                            Down

The "<D" refers to pushing the uJoyStick "Down" towards the bottom edge of the WioTerminal (not depressing the uJoyStick). On the above left is a "digaram" of the uJoyStick switch-names (full names shown on the right). The uJoyStick is the main blue switch to the bottom right just below the LCD display (see the above left image). It can be pushed in the 5 directions indicated. "Enter" means pushing it down into the WioTerminal, not pushing it toward the edge of the WioTerminal. The user of the WioTerminal will quickly learn the above 5-letter "acronym diagram" that describes this uJoyStick. The E in the "<E" that appears on the screen means that the program to the right of the "<E" will be invoked. Other program names can be seen if the uJoyStick is pushed in direction "D". The "HelpMain_i.py" is the first or 'Top" program of an unseen list of programs. Early in the life of wioMainMenu.py , there are only 7 programs that can be invoked. They are:

       PROGRAM LIST               DESCRIPTION
       -------------              -----------
       helpMain_i.py              shows the help file for wioMainMenu.py
       listDir_cmd_i.py     (fut) lists the directory of the current folder
       n_i.py                     lists the main statements (features) of a .py program
       pgdn_cmd_i.py        (fut) page down the current LCD screen
                                  Note: It double beeps,if more than 1 character is typed into
                                        the RPi keyboard, but only the 1st char will be used. 
       restart_i.py               restarts wioMainMenu after clearing most internal lists
       wioClock_i.py              displays a current clock on the WioTerminal
       end_i.py                   beeps & ends the wioMainMenu menu, leaving the screen blank
                                     (and hopefully turning off the power to the WioTerminal)

Quick Wiki for the User of the wioMainMenu

Please glance at the "Splash Screen" a few headings down before continuing.

Upon boot-up, only the first 2 (top) items of the PROGRAM LIST will be visible along with "---top-------------------------------------------" above them. If the user depresses the uJoyStick button it means that the user wishes to "hit Enter". This is the same as hitting the "Enter key" on a keyboard. Hitting "Enter" in this manner will cause the "helpMain_i.py" program to be invoked. Instead, if the user pushes the uJoyStick towards the bottom edge of the WioTerminal, this is known as pushing the "Down" switch. The wioMainMenu program will go "down" the list of programs and will display "listDir_cmd_i.py" below "helpMain_i.py". This raises the program named "listDir_cmd_i.py" below the "helpMain_i.py" Now if the user "hits Enter", the WioTerminal will run the listDir_cmd_i.py program. Each time the user hits "D" the next program on the "PROGRAM LIST" will be displayed. Hitting the "U" will replace the displayed program name with the name that is above (ie up above) in the PROGRAM LIST. These three switches on the uJoyStick are all that is needed to communicate with wioMainMenu. After the desired program name appears, hitting "E", the Enter key, will cause the chosen program to be run. Usually 3 program names appear under the PROGRAM LIST, the top of the list is "---top------------------" and the bottom of the list is "---bottom----------------------". Of course, neither of these two are names of programs that can be run.

Info for the Users Who Are Programmers

[non-programmers can (and should) skip this section]
[non-programmers should skip until the heading "Splash Screen ....".]

How does the wioMainMenu know which programs can be invoked? Well, it doesn't really know the names of the improvised Python programs available to it. Nor does it know exactly which "improvised functions" have been "packaged with" the wioMainMenu program. The "packaging process" means "placing functions" with (ie prepending them to) the mainStub.py program to form the "main.py" program that will be invoked at boot-time. Each program that can be invoked is automatically placed in the wioMainMenu's PROGRAM LIST. This is done when wioMainMenu starts up. It looks at all the contents of the top folder of the WioTerminal. Any file names that end in "_i.py" will be automatically placed in the PROGRAM LIST which is a properly formed list in the Python language. So all that the user needs to do is to place a copy of each of these programs in the top folder (where main.py resides) on the WioTerminal.

The program that creates the final main.py program must include each of these programs (whose names end with "_i.py") in the source code for main.py. They must be prepended to the mainStub.py to form the whole main.py program. These 2 preparatory steps will normally be done by the program named mainBuild.py .

There are other normal Python functions (not improvised Python code) used by wioMainMenu.py. They must be included by the programmer within the mainStub.py program. if not, the wioBuild.py program will prepend them. Note that neither mainBuild.py, nor mainStub.py nor main.py will be included in the PROGRAM LIST. This is because none of them have names that terminate in "_i.py" The seven (to date) names that do end in "_i.py" must be written as "improvised programs" (functions) that can be called with absolutely no parameters. Being written as functions means that they can be invoked (ie called) by wioMainMenu.py. These "programs" are spoken of as being "improvised functions". These functions are "programs" that can be invoked by a main calling program.

The wioMainMenu.py program participates in this "improvised function" process by searching through its folder (the top folder) for all programs ending in "_i.py" that exist. It places them all in the PROGRAM LIST. When the user selects which "improvised program" to "run", the wioMainMenu program will try to invoke it. This is done using a "try:" & Except:" statement pair. If it fails to find a function of that name, it means that the mainBuild.py program didn't include it with the mainStub.py program. Therefore, invoking it will fail and the user will be notified, but the main program should continue running. The wioMainMenu.py won't really fail, the user will merely be given another chance to select and invoke one of the other "improvised functions" by the main.py program.

The job of the wioMainMenu.py program stub named mainStub.py is very simple and won't require updating very often. However whenever a new or revised "improvised function" needs to be added, it will be necessary to rebuild and copy (ie flash) the updated main.py to the WioTerminal. This flash should include any revised/new "improvised programs" in the "main.py" that is run every time the WioTerminal is "booted up."

Of course, final testing is always necessary.

Waiting for Keyboard input

I went looking for the Python source code for the inputWto() function that waits for input but with a timeout. I discovered that it had been a long time since I attempted to make a list of all the Python functions that I have coded over the past 10 years or so. This list (Source 01) is quite long (12 screenfulls) and is only a "list" of function names. It does NOT include any actual code. My apologies for the spaghetti format of this list. The list helps me look up the name of any function that I might have forgotten about coding.

I had developed Python code for a function called inputWto() (Source 02) which optionally plays typing sounds (see typing_3.mp3 in source 03). But this mp3 file cannot be output on the WioTerminal's "buzzer" speaker. Furthermore this function needs the soon-to-be-deprecated "select" import.

The source included in the code shown below, describes 5 or 6 other possible solutions (like "select"), none of which work on the WioTerminal Python. These other solutions need the following imports that fail on the WioTerminal
import threading
import keyboard
import curses
import sshkeyboard
import poll
pip install pynput

Code from wroscoe at stackoverflow

The following notes describe code that will wait for a key to be "pressed":

wroscoe wrote: 
Thanks for the help. I ended up writing a C DLL called PyKeyboardAccess.dll 
and accessing the crt conio functions, exporting this routine:

#include 

int kb_inkey () {
   int rc;
   int key;

   key = _kbhit();

   if (key == 0) {
      rc = 0;
   } else {
      rc = _getch();
   }

   return rc;
}
And I access it in python using the ctypes module (built into python 2.5):

import ctypes
import time

# first, load the DLL
try:
    kblib = ctypes.CDLL("PyKeyboardAccess.dll")
except:
    raise ("Error Loading PyKeyboardAccess.dll")

# now, find our function
try:
    kbfunc = kblib.kb_inkey
except:
    raise ("Could not find the kb_inkey function in the dll!")

# Ok, now let's demo the capability  
while True:
    x = kbfunc()

    if x != 0:
        print "Got key: %d" % x
    else:
        time.sleep(.01)

# Source: https://stackoverflow.com/questions/292095/polling-the-keyboard-detect-a-keypress-in-python
The above includes c/c++ code so I will not procede down this path.

My first 3 Python Programs for the WioTerminal

Recent versions of my first 3 programs for the WioTerminal can be seen in Sources 04, 05 and 06 below. The first program was named "test_anyButton_py.txt". It's purpose was to test buttons and switches on the WioTerminal. The second program reads and displays the directory in the top folder of the WioTerminal. This list is a two-page list, that needs the Enter button to be hit to view the second page. The third program displays the current date & time on the WioTerminal. This third program is not quite complete in that the wrong (2 or 3 hours wrong) time is displayed and it cannot yet be "adjusted" in real time by the user. Instead the time-to-be-displayed is read and initialized from a small file in the top folder of the WioTerminal. The date/time that is read and displayed corresponds to the time of the most recent build of the wioMainMenu_i.py program.

These programs were initially coded and tested on a Raspberry Pi computer (using Thonny). Final testing was conducted on the WioTerminal itself. These 3 programs are only partially complete. Some minor issues remain. The version of MicroPython on the WioTerminal is slightly different from Thonny. The main issue is not being able to "import" libraries that contain crucial functions and methods. This is not surprising because of the limited storage space on the WioTerminal. This is because the WioTerminal is not yet connected to the external world by WiFi, so these libraries are not available in real time. These specific problem libraries are listed above, under the heading "Waiting for Keyboard input".

Splash Screen for wioMainMenu

          1         2         3         4         5
012345678901234567890123456789012345678901234567890123456
     ^1        ^2        ^3          (c)ICH180RR 03:24 00 (top line)
--> :tba       tba       tba                          |01
| --> :Run | # ipsum libit sunum  command line (tba)   02
| |                                 device:WioTerminal 03
| |                   progName:wioMainMenu_v01o03_i.py 04
| |                         *   * ***** *   * *   *    05
| |               U         ** ** *     **  * *   *    06
| |              LER    Wio * * * ***   * * * *   *    07
| |               D         *   * *     *  ** *   *    08
| |PROGRAM LIST             *   * ***** *   *  ***     09
>U ---top----------------------------------------------10
>E:wioHelp_i.py                                        11
>D wioClock_i.py                                       12  
               Use >D & >U to scroll thru PROGRAM LIST 13
               Then Hit >E>L>E  to run it.           _ 14 (bottom line)
******************************************************15
   PROGRAM LIST (shows 2 or 3 runnable program names) 16
   ^1        ^2        ^3 These buttons spell anything17
>E:         The 1st: the 3-button spelling mechanism  18
>E:         The 2nd: the Command Line Interface (CLI) 19
>L          This selects which >E is active           20
>U>D        These buttons select any Prg or list      21
>R          This moves the CL cursor (|) to the right 22
            Any letters or file names selected are    23
            inserted into the CL at the CL cursor (|) 24
letters     These letters can be chosen for commands  25
            See the character list (letters) below.   26
file names  See list of program/files (PROGRAM LIST)  27
            At the bottom of the PROGRAM LIST will be 28
            appended the names of all the variables   29
            "list"s, "int"s or "str"s that have been  30
            defined by the user of wioMainMenu during 31
            this session.                             32
This wioMainMenu program needs a function (like inputWto) to read any switch or button from the WioTerminal. An early version of it is named anyChar(). I suggest that it be named inCharWto because it returns only 1 character at a time from the WioTerminal. It could be called like inputWto is called, with four parameters as follows:
Parm1: char str to be used as a prompt (if any, null if not).
Parm2: N is an integer number of seconds to wait before timeout.
       If N=0 this routine will hang, waiting for some input
       else, a null character string is returned after timeout
       else, the first single character entered is returned.
Parm3: deviceStr which is "WioTerminal", "RPi" etc
Parm4: null or (Fut) mp3 of the sound of typing.

This routine, in the future, will use interrupt routines that sense whether 
or not a character is available to be returned, sleeping when necessary.

The inCharWto function returns:

returnParm1: the character that was read
returnParm2: returns True (or False and "" if it timed out)


Characters (Spelling) Using The Top 3 Buttons

The following can be selected using the top 3 buttons:
$1                     $2                    $3
-------                -------               -------
""                     ""                    ""
" "                    " "                   " "
CTRL-                  import                board
list                   print                 =
str                    fut                   )
int                    ;                     (
grep                   fut                   0
a                      A                     1
b                      B                     2
c                      C                     3
d                      D                     4
e                      E                     5
f                      F                     6
g                      G                     7
h                      H                     8
i                      I                     9
j                      J                     .
k                      K                     ,
l                      L                     :
m                      M                     ;
n                      N                     <
o                      O                     >
p                      P                     /
q                      Q                     \
r                      R                     -
s                      S                     @
t                      T                     #
u                      U                     $
v                      V                     %
w                      W                     &
x                      X                     (
y                      Y                     )
z                      Z                     ~
import                 os                    
os.                    uname(                )
dir(                   board                 fut
board.                 BUTTON_               1
fut                    A1                    board.D1
fut                    A2                    board.D2
fut                    A3                    board.D3
fut                    A4                    board.D4
fut                    A5                    board.D5
fut                    A6                    board.D6
fut                    A7                    board.D7
fut                    A8                    board.D8
fut                    BUZZER                fut
fut                    D9                    fut
fut                    D10                   fut
fut                    D13                   fut
fut                    DAC0                  CS
fut                    DAC1                  MISO
fut                    IR                    MOSI
fut                    I2S                   fut
fut                    LIGHT                 PWR
fut                    MIC                   READY
fut                    MISO                  RXD
fut                    MISI                  TXD
fut                    RTL_                  CLK
fut                    RX                    fut
fut                    SD_                   DET            
fut                    SWITCH_DOWN           SCK
fut                    SWITCH_LEFT           fut
fut                    SWITCH_PRESS          fut
fut                    SWITCH_RIGHT          fut
fut                    SWITCH_UP             fut
fut                    TX                    fut
For example, the three top buttons can be used to "spell" out "listA =" which would normally be followed by a file name selected by >U and >D on the "select object" line. The final command might be:

listA = wioHelp_i.py

which would load all the lines of code in the wioHelp_i.py program into an internal Python list named "listA".

Most desired command lines can be formed using the top 3 buttons for spelling and the uJoyStock for selecting objects such as file names. The >U and >D for the command line permit previous commands to be selected and then modified as necessary. Selecting the letters or names in this manner can be very tedious but is certainly better than having no keyboard at all.

Because nothing can be written anywhere on the WioTerminal (except [fut] on the SDcard ), creating code can be difficult. One way wioMainMenu helps is by dynamically adding all variable names (e.g. [listA]) to the bottom of the list of programs/files. This way, existing variables can be referenced without the need of typing the whole variable name each time. To date, the only way of keeping program segments (previously coded programs) is by using a camera to photograph the program from the screen (LCD) of the WioTerminal. Another way is to use minicom on an attached RPi, but that has not yet been successfully done using the WioTerminal. Note that the maximum capacity of the uSDcard is 16 GB.

Invoking The inCharWto Function

Usually the inCharWto function will be invoked as in the following test program. Note that the function beep(device) has not yet been finished. It is, of course, device dependant.

def test_inCharWto_v01o01_i():        #improvised test program
    # calls getOneWioChar()
    # by D@CC on 2023DApr07    #untested
    progName="test_inCharWto_v01o01_i"
    print('for device == WioTerminal, needs inCharWto("",nSecs,"")')
    print("progName:",progName)
    #device=getDevice()
    device="RPi"                      # initial testing on RPi

    strPrompt="W"                     #for WioTerminal and for RPi
    # strPrompt="W" means that this is a WioTerminal situation
    # initially test on the RPi

    # begin with these being displayed##############################
    device="RPi"

    # read improvised file names from top folder
    listCurrentPrograms=createImprovisedProgramList(device)
    print("listCurrentPrograms:",listCurrentPrograms)
    listCurrentVariables=[ \
    ]   # end of list
    print("listCurrentVariables:",listCurrentVariables)
    # new WioTerminal should show:
    #   "         0         1         2         4         5
    #   "---top--------------------------------------------
    #   wioHelp_i.py
    #   wioClock_i.py
    #   refreshMain_i.py
    #   "---bottom-----------------------------------------
    #   
    posE=3                       #
    #                            1 readiing the top 3 buttons
    #                            2 adjusting the CL
    #                            3 selecting a file (or list, chr or int) 
    currentCL="run"
    listCurrentFiles=listCurrentPrograms         # start with listCurrentPrograms
    listCurrentFiles.append(listCurrentVariables) # append the  listCurrentVariables
    currentFileName=""
    currentB1=""                 #buttons
    currentB2=""
    currentB3=""
    currentFileList=[" \
    
    ]
    mp3Typing=""                 #no typing sounds while waiting for chrIn
    # end of initialise the display ################################
    
    # show the current display on the screen of the device
    displayWithCurrentValues(chrIn,posE,currentCL,currentFileName,listCurrentFiles,currentB1,currentB2,current B3,device)

    chrIn=""
    while not chrIn=="C" :
        while not (chrIn==""):
    	    chrIn = getOneWioChar(device)
            # Note the author has not yet decided which sequence of events will be
            # used (from the Wio Terminal) to signal CTRL-C.
            # eg. top 3 switches following "<L" then followed by "<E"
            #        i.e. "<L" then "CT"   "RL" "C" is a possibility
            #          or "<L" then "CTRL"  "-"  "C" 
            #          or "<L" then "CTRL-" "C"  "" is another possibility (preferred)
            # followed by "<E"
            # One (or more) of these sequences will return a "C" meaning CTRL-C
            #     instead of merely displaying the characters displayed on the LCD.
        #while end
        print("chrIn:",chrIn)
        #   acceptable chrIn are "ULERDC"
        if chrIn == "C" : break    #out of while loop
        #                                  ##############################################################
        # process the character                                                       process and display
        # the next statement invokes the impact of the chrIn
        chrIn,posE,currentCL,currentFileName,listCurrentFiles,currentB1,currentB2,currentB3,progName,device \
        = \
        processChar(chrIn,posE,currentCL,currentFileName,listCurrentFiles,currentB1,currentB2,currentB3,progName,device)
        # now the character that was input has altered the current display parameters
        displayWithCurrentValues(chrIn,posE,currentCL,currentFileName,listCurrentFiles,currentB1,currentB2,current B3,device)
        #                                                                         show the new new display
        #                                  ###############################################################
    #while end
    # C encountered ; treat like a CTRL-C
    print("CTRL-C encountered, exiting program ", progName)
    print("end of ",progName) 
    return
#def end
#def test_inCharWto_i    end of Test program

#                                          ###############################################################
def getOneWioChar(strPrompt,nSecs,device,mp3Typing): # for WioTerminal
    # by D@CC on 2023DApr15  untested
    # strPrompt should be "" or "W"
    # nSecs is 0 or the number of seconds before timeOut
    #    0 means wait forever without timing out
    # device should be "WioTerminal" or "RPi"
    # mp3Typing should be "" for no sounds while prompting for chrIn
    # calls function inCharWto() for device="WioTerminal"
    #
    # returns strIn
    #
    # while loop to wait for 1 character to be input (or a button to be pressed)
    nSecs=1
    strIn=""
    strPrompt=W"
    while strIn=="" :
        if device=="WioTerminal :
            strIn=inCharWto("",nSecs,"")    # sleeps nSecs while waiting for input
        else:   			    #not WioTerminal eg RPi
            #always use strPrompt="W" for "RPi"
            strIn=input(strPrompt)          # hangs while waiting for input
            if (len(strIn) > 1):
                beep()                      # beep once when rejecting extra characters
                strIn=strIn[0:1]            # keep only the first character
            #sleep(1)                       # do not relinquuish the CPU while waiting
            if strIn=="" : strIn="E"        # if RPi always return an "E" instead of ""
        #if end
        #always reject non WioTerminal button & switch characters if Prompt is "W"
        if strPrompt== "W"
            if not (strIn in "ULERD!@#C") : # only accept WioTerminal switches
                                            # C is a signal to terminate (similar to CTRL-C)
                beep();beep()               # beep twice when rejecting a character
                strIn=""                    # get another chacter
            else:
                break                       # break out, accepting this character                 
            #if end
        #if end
    #while end
    return strIn
#def end

####################################
def beep():
    print("beep:")
    return
#def end
####################################
def inCharWto(strPrompt,nSecs,strDevice,strMp3):
    # to be coded
    inStr="E"  #return CR immediately
    return inStr
####################################
#mainStub routine
Doh=test_inCharWto_v01o01_i()                  #invoke improvised program
print("_i returned:",Doh)


print("end of main")  
####################################
#/mainStub.py
####################################
def mainBuild_v01o01_i():
    progName="Test_mainBuild_v01o01_i"
    result = True
    print("starting:",progName)

    print("ending:",progName)
    return result
#def end
###################################
#mainStub routine
Doh=mainBuild_v01o01_i()                     #invoke improvised program
print ("iP returned:",Doh)
print("end of main")  
####################################
This code, when called, loops with an internal sleep(nSecs). It watches for a character to be entered, if none; it sleeeps for 1 second then returns "" as strIn. Then it goes through the while loop until the strIn is not null, then it prints out the strIn. By putting the sleep() in the function, this function can make use of interrupts to sense whether or not a string is ready to be read, relinquishing the cpu to other threads (ie sleeping) while waiting. By using interrupts, this routine will be able to process each character as soon as it is available. Without interrupts, the internal sleep slows the processing of characters to a speed of 1/second. In this manner, different versions of Python can all perform without fail.

The Function Named "requires"

A recent thought is for the mainBuild.py program to look for a statement (in each of the source code programs that it includes in the build) that names each of the functions it requires. The statement will be of the form:
 requires(anyChar(, , , , , , minVersionF=2.3) )
The function named "requires" will invoke the function "anyChar" with a final parameter of minVersionF which has a float number which is the minimum version of the function named "anyChar" that it expects and needs. If the version of "anyChar" is less than 2.3 (in this example case) then the function "anyChar" should issue an error (or at least a warning) stating that it was invoked by a program requiring a higher version of the function. If the function sees the minVersionF parameter, it should do this test and then immediatesly return without performing the function. If the function is called without mentioning the minVersionF parameter, then the invocation of the function is a normal invocation. The series of "requires" statements (e.g. as shown below) should appear only at the beginning of the program and not later on. The "requires" function simply invokes the function with a "try. . . except" pair. If the try fails, this means that the function was not inserted or was not invoked correctly by the mainBuild program or was the wrong version. In this case, the requires() function itself (or Python) should cause an error message and take action to abort running the subsequent statements in the program named "main.py". The "requires()" function should return True if everyhing is ok (or False if not) when it is called with a minVersionF= parameter.

Use of the "requires" function should be as follows:
progName=""
if  True \
    and requires(anyChar(, , , , , , minVersionF=2.3)) \
    and True \ #etc
    and requires(anotherFunction(, , , , , , minVersionF=0.0)) \
    and True : Doh = True
else:
    print("WARNING: This program ",progName," requires one or more of the functions listed above (but was not usable).")
# if end.

If the above statements are not included in the mainStub program, the program will run but without checking to see if (and/or ensure that) the necessary functions have actually all been included. The mainBuild program is responsible for locating and including these functions with mainStub.py when it is "building" the main.py program.

Using MicroPython on the Wio Terminal

In my article 186, I describe work done by scruss using MicroPython with the Wio Terminal. The MicroPython support for the Wio Terminal is not yet complete, but (as of 2023DApr13) scruss mentions that the following Wio Terminal components are supported:

What does work

Display           
			- ILI9341 320x240 px, RGB565 via SPI
Accelerometer      
			- LIS3DHTR via I2C
Microphone       
			- analogue
Speaker          
			- more like a buzzer, but this little PWM speaker element does allow you to play sounds
Light Sensor      
			- via analogue photo diode  (but is covered when a Battery is attached)
IR emitter       
			- PWM, not tied to any hardware protocol   (but is covered when a Battery is attached)
Internal LED      
			- a rather faint blue thing, but useful for low-key signalling
Micro SD Card        
			- via SPI (max 16 GB). Works well with MicroPython's 
                            built-in virtual file systems
Switches and buttons                                                               U
			- three buttons on the top, and a five-way mini-joystick: LER
I2C via Grove                                                                      D
			- a second, separate I2C channel.

MicroPython and the uSD Card ( uSDcard )

by scruss (I think)

uSD Card
-MicroPython interfaces: machine.SPI (channel 6), machine.Pin, machine.Signal
-Control Pins: Pin("SD_SCK"), Pin("SD_MOSI"), Pin("SD_MISO") for SD access. 
    Pin("SD_DET") is low if an SD card is inserted, otherwise high
Library: copy sdcard.py from micropython-lib to the Wio Terminal`s file system.

Rather than provide a small canned example (there`s one here, if you must: 
    Wio-Terminal-SDCard.py [Source 12] ) here`s my boot.py startup file, showing how I 
    safely mount an SD card if there`s one inserted, but keep booting even if it`s missing:
The parentheses pairs that don't display in the above are "left double quotes" and "right double quotes".

[In MicroPython,] code:
# boot.py - MicroPython / Seeed Wio Terminal / SAMD51
 
import sys
 
sys.path.append("/lib")
 
import machine
import gc
import os
import sdcard
 
machine.freq(160000000)  # fast but slightly jittery clock
gc.enable()
 
# mount SD card if there's one inserted
try:
    sd_detected = machine.Signal(
        machine.Pin("SD_DET", machine.Pin.IN),
        invert=True,
    )
    sd_spi = machine.SPI(
        6,
        sck=machine.Pin("SD_SCK"),
        mosi=machine.Pin("SD_MOSI"),
        miso=machine.Pin("SD_MISO"),
        baudrate=40000000,
    )
    sd = sdcard.SDCard(sd_spi, machine.Pin("SD_CS"))
    if sd_detected.value() == True:
        os.mount(sd, "/SD")
        print("SD card mounted on /SD")
    else:
        raise Exception("SD card not inserted, can't mount /SD")
except:
    print("SD card not found")
For more information, see Source 12. It only takes 15 lines of code to list the directory of the SDcard. These 15 lines of code (from scruss at Source 12) are:

# MicroPython / Seeed Wio Terminal / SAMD51
# Wio-Terminal-SDCard.py - mount and use the SD card
# by scruss, 2022-10
# -*- coding: utf-8 -*-

from time import sleep_ms
from machine import Pin, SPI
from os import VfsFat, mount, listdir
import sdcard

sd_spi = SPI(6, sck=Pin("SD_SCK"), mosi=Pin("SD_MOSI"),
             miso=Pin("SD_MISO"), baudrate=40000000)
sd = sdcard.SDCard(sd_spi, Pin("SD_CS"))
mount(sd, "/SD")
print(listdir("/SD"))
The two above sets of uSDcard code have not yet been tested by the author (as of 2023DApr13).

[ The author is moving the remainder of this article to Article 191 ]

Grove - Temp & Humidity Sensor ( SHT31 )

This I2C Grove device (Seeed Studio SKU 101020212 US$ 9.90 ) uses I2C to measure temperature and humidity. It can be referenced at Source 13 below. It is based on the Sensirion SHT3x-DIS sensor. It can probably be used instead of the I2C TMP102 in the pir2 system developed by the author. Coding changes would be necessry. The SHT31 is compatible with the Wio Terminal. It uses CMOSens technology and is delivered with a Grove cable. The SHT31 requires an unbuckled Grove cable. It has 2 user-selectable addresses. The main address of the SHT31 is I2C Address 0x44. The SHT31 board design overview by Geppetto, is included as a pdf file at Source 13. A zipped copy of this same design is available at Source 14. Some of the information resides at Github. Its Github date is 2020CFeb03. A Library and example (c/c++) code can be found near the bottom of Source 14 (www).

The Grove pinout is GND, VCC, SDA, SCL . The back view of the Grove Connector shows that the GND pin is at the top. The image of the Grove connector shown below comes from Source 15 of this article (190). Source 15 is named "INA3221 Triple Load Current and Voltage Sensor (V07)". But Source 15 actually goes to "The INA3221 Breakout Board" which itself has a Source 06. That Source 06 is named IT: INA3221 Current and Voltage Sensor . Source 06 is actually titled "The INA3221 Breakout Board". In Source 06 on its p12, the lower image is titled "PiR2A2 Schematic Diagram" dated 2020FJun18 . This drawing is actually Source 03 of Article 143 (S143:03). A portion (a snippet) of that image is shown below:

(To enlarge .....Click it)
thumb: Grove_on_PiR2.jpg

Grove on PiR2A2

In this snippet (shown above) the GND pin is at the top when the connector is viewed from the back (where the wires come out) with a small "buckle" on the right. This snippet also shows the color of each wire. The black wire is GND, the red wire is Vcc, the white wire is SDA and the yellow wire is SCL.

Return now to the full image S143:03 (where the snippet was clipped). We see the Grove Connector (where either the SHT31 or the TMP103 could be connected.) The main image, S143:03, also shows a TMP36 temperature sensor. Any of the three temperature sensors (mentioned in this article) can be used with the PiR2A2 device.

My Many PiR2D-like Devices and PiR2W (fut)

Source 16 lists the evolution of my PiR2 devices resulting in the PiR2D device (and soon, to the PiR2W device). The author plans to design and build a new PiR2 device using the Wio Terminal. It will be called the PiR2W. This is a very attractive project because the Wio Terminal already houses many of the complex components needed for a powerful PiR2W device. Most important are the 40 pin GPIO, the Grove connectors, the ADC capabilities, the Battery (Wio Terminal Chassis - Battery) and the Buzzer. Only the 3 LEDs, the heating resistor (and possibly the light sensors) need to be added. All 4 of these additions can easily be soldered onto a small "hat" board that plugs directly into the 40 pin GPIO pins on the WioTerminal. Software for the microSD card will need to be finalized. The three push-button switches on the top edge of the WioTerminal can serve as input devices instead of the photocells (light sensors). The log (and other information needing to be saved) will be stored on the uSD card.

On the PiR2W, the Red, Yellow and Green LEDs (Left to Right when viewed from the back of the Chassis - Battery) will be connected to GPIO pins 11, 08 and 07 respectively. The HEAT resistor will be driven by GPIO pin 09. GPIO pin 09 will also serve as Digital Out. The Yes and No buttons will be top buttons numbered 1 and 3 respectively on the WioTerminal. Only 2 Grove connectors will be needed, one for the I2C temperature sensor and the other for one ADC analog input point. The number of pins that "clash" will be handled by software. The PiR2D schematic at Source 17 shows that all sensors and actuators can be provided by the WioTerminal. This future device, the PiR2W, certainly is the best "fit" for a almost perfectly ready-out-of-box PiR2 Device.

The Adafruit 4132 board, called a GPIO Expander Bonnet, shown below, easily provides access to pins that drive 4 digital outputs. The additional 16 pins on the Adafruit 4132 are driven by a MCP23017 multiplexor IC. Unfortunately the exact GPIO pins are not available on the 4132 but pin re-assignments are not a big issue because they can be handled by software. This "hat" board (housing the 3 future LEDs) can easily plug into the back of the WioTerminal or to the back of the Wio Terminal Chassis - Battery.

The Adafruit 4132 board: GPIO Expander Bonnet

(To enlarge .....Click it)
thumb: 4132.jpg

Adafruit 4132 "Hat" for the Raspberry

The Adafruit GPIO Expander Bonnet (4132), shown above, is available from Mouser Electronics Canada for CAD$ 13.73 (DataSheet at Source 18). The low number of components on the future PiR2W will easily fit on the above small "hat" or "bonnet" that can be plugged into the GPIO pins on the WioTerminal if the bonnet has male & female GPIO headers. Hopefully, the software to drive the PiR2W can also be completely ported to the WioTerminal. Porting all the code to the WioTerminal (and the PiR2W) will permit the WioTerminal to be a stand-alone device with a uSD card to house the resulting data logs. The (schematic) drawing named PiR2DrawK12.odg (Shown below) will serve as the basis for a future smaller schematic describing the circuitry needed on the future PiR2W. The sideways positioning of the Red, Yellow and Green LEDs might cause a user to tilt his/her head slightly to the left to make the LEDs resemble a 'traffic light". The buttons will convey the idea of Red on the left (meaning "No") and green on the right (meaning "Yes"), similar to the colored light designations used for marine navigation. Alternately, the whole RPi/WioTerminal "block" could be oriented by 90 degrees putting the 3 LEDs and switches on the side, oriented like a "traffic light".

Orientation of the 3 LEDs

If the 3 LEDs are soldered in the normal way (with their bases very close to the board), it will be impossible to attach an RPi even if the GPIO Expander Bonnet were equipped with a male and female header. But it is possible for the 3 LEDs to be given longer insulated leads. Then the 3 LEDs can be soldered into the 8 top expansion IO plated-through holes and then bent 90 degrees upward (ie sideways to fit between the male pins of the 40 pin header). By doing this, the 3 LEDs will be sandwiched between the GPIO Expander Bonnet and the RPi. They will protude upwards and will be situated very close to the 3 buttons on top of the WioTerminal. All of the other connectors of the PiR2 remain sufficiently exposed for use. For this to succeed, extra-long male 40 pin headers would be needed.

Another idea would be to orient the RPi with its base being the edge where the uSD card is plugged into the RPi. In this case, the switches and the three LEDs would be on the side of the device. To make these three LEDs appear as a typical "traffic light", the red and green LEDs would need to be interchanged. This would make the red LED be the upper LED. To protect the uSD card on the RPi, a base would need to be attached to the 2 existing bolt holes on the lower edge of the RPi.

Probably the 3 buttons (and other WioTerminal devices) can be controlled by the RPi (in the absence of the "Wio Terminal Chassis - Battery"). To do this, the On/Off switch on the WioTerminal might need to be switched Off. The design of the WioTerminal is indeed amazing! I wonder for how long an RPi Zero W is powered using the Wio Battery (and WioTerminal devices) in case of a Power Outage? Because a router fails immediately during a power outage, LoRa communications become very attractive.

PiR2D3 Schematic for the WeatherHat Pro

  
                       WeatherHat Pro wiring to create PiR2D3

                                                    5V0
                                     DigIn-|-PB(NO)-3V3     3V3
                 DigOut---1K0--|           |
                               |           |----1K0-------- MOSI (10)
                               |           |----1K0---------GND
                               |
                  HEAT(remote)-|----------------------------MISO (09)
                    |          
                  100R(remote)
                    |
                    |---------|
                              |
                 3v3          |
                  |           |
 (No  "Button")   |-CDS0----| |-260R---<RedLED--------------SCLK (11)
                  |         | |
                  |         | |-260R---<YelLED--------------SP10 (08)
 (Yes "Button")   |-CDS1--| | |-260R---<GrnLED--------------SP11 (07)
                          | | |
                          | | |---------------------------- GND
 (   GrnLED was           | |                       I
  formerly WhtLED)        | |                       2
                          | |                       C
                          | |-----------------------------|
                          |                               |
                          |                    GND---10kR-|-A1
                          |                        
                          |                              nc A2
                          |                               
                          |-------------------------------|
                                                          |
        From PiR2DrawK12.odg                              |
        For  ePC Article 146                   GND---10kR-|-A3
        By   D@CC
        Date 2021AJan30

Boards Making Up the PiR2W

	RPi Zero W
	PiR2W (3 LEDs on the Adafruit 3142)
        Wio Terminal Chassis Battery
	Wio Terminal (LCD monitor, buzzer & top 3 buttons)
The simplicity of the PiR2W hardware coupled with the common use of MicroPython code makes a very feasible new combination. To summarize; the final PiR2 will be comprised of:

Shown below is the PiR2W combination of boards with their GPIO pins plugged together.

the RPi Zero W (with GPIO02 in the top right corner, with a Male GPIO)
the PiR2W (Adafruit 4132) male & female GPIO
    with 3 LEDs mounted on it (Red up and Green down).
the Wio Terminal Chassis - Battery (male & female GPIO)
the Wio Terminal (female GPIO02 at top right corner)
    with the on/off switch on the top edge beside the
    slot for a uSD memory card (up to 16 GB).

Note 1: Simply remove the RPi to let the WioTerminal control the peripheral devices.
Note 2: GPIO pin 2 is in the top right corner on the RPi as oriented below.
Note 3: The removable uSD memory card is on top and is easily accessible.

The uSD card can be read (or written to) by either the RPi or the Wio Terminal
but not at the same time.

Hopefully, the uSD card will use the same drivers as the uSD card on the 
Cytron Maker pHAT board for the Raspberry Pi.

These 4 devices will simply be plugged together using their male/female sets of GPIO pins. The uSD card will house the log file. A buzzer, 3 LEDs and a small LCD screen are available to communicate with the user. A Grove connector will accept a cable leading to a thermometer located in a refrigerator or freezer. Today the RPi used WiFi to communicate with the world via a nearby router. In the future, the Wio Terminal will be able to use Wifi. Until then, the WioTerminal will use this PiR2W device to monitor refrigerators and freezers with a buzzer and LCD alarm.

[ end of the portion of this article that will be moved to Article 191. ]

Other Related Thoughts

A : When inCharWto() is used on WioTerminal, each switch/button returns 1 char at a time. But during testing on the RPi, each character that is input will need to be followed by the Enter key.

(To enlarge .....Click it)
thumb: Tinkercad.jpg

TINKERCAD

B : My grand-daughter, Emma, says that her high-school class used Tinkercad (Source 07 ) to design and print some 3D objects. These objects were then printed on a 3D Printer. She says that Tinkercad is a very easy-to-use CAD design tool.

C : Source 08 describes LoRa (a Long Range WiFi) mechanism in an email by TG Mullins. Apparently, Seeed Studio has software for the LoRa Node support. On Source 09, look for the "AIoTs GPS & state tester" which is based on their product "Wio Terminal Chassis-LoRa-E5 and GNSS" to develop.

D: Source 10, named " Backup Power Options for Homes in PAP " by TG Mullins describes the many alternative products that are available to provide standby power. These devices are called " Standby Power Generators " some of which are sold at CostCo in North America. Inverters are also described. See Source 19 for the Firman T08072 Standby Generator Owner's Manual. The author purchased a Firman Tri-Fuel Generator in September of 2023.

(To enlarge .....Click it)
thumb: T08072.jpg

Firman T08072 Tri-Fuel Generator

Also see Source 21 for the author's notes about the T08072 Tri-Fuel Standalone Generator. The generator came with a LPG Propane Hose. The author also bought a 20 lb Propane cylinder.

E : In the Seeed forum (Source 11) topic "??'Wio Terminal'??" by xieliang stated 2020CMar, writer chordlines states: . . . . . . the maximum storage space is 507,904 bytes. This is not the maximum flash memory capacity ( 4 MB ) on the Wio Terminal. So, what is actually limited to 507,904?

Conclusion

This program, wioMainMenu.py and the PiR2W, by David @ ColeCanada.com, are works-in-progress as of 2023DApr14.

This article, by D@CC, is of course, also a work-in-progress as of 2023DApr14.

End of Article (Sources Follow)

Sources

Video Sources

Video Source V190:01:www Exploring the Wio Terminal ( 1:14 min) by Seeed Studio in 2021

Web Sources

Web Source S190:01:www IX_functions_Python_List.txt (many from 174.html) by D@CC of ICH180RR on 2023DApr07
Web Source S190:02:www inputWto_py.txt ( from 174.html) copied by D@CCof ICH180RR on 2023DApr07
Web Source S190:03:www typing_3_mp3.txt by D@CC of ICH180RR on 2023DApr07
Web Source S190:04:www test_anyButton_py.txt (my 1st Wio program) copied by D@CC of ICH180RR on 2023DApr08
Web Source S190:05:www WioIXkb01o11_py.txt (my 2nd Wio program) by D@CC of ICH180RR on 2023DApr08
Web Source S190:06:www wioClock_v02o11_2023DApr05_py.txt (my 3rd Wio program ) by D@CC of ICH180RR on 2023DApr08
Web Source S190:07:www Tinkercad by Autodesk Fusion 360 on 2023DApr11
Web Source S190:08:www LoRa (Long Range WiFi) by TG Mullins on 2023DApr13
Web Source S190:09:www Search Text for "LoRa Node with AIoTs GPS on Wio Terminal" by Seeed Studio and Edge Impulse on 2021KNov23
Web Source S190:10:www Backup Power Options for Homes in PAP by TG Mullins on 2023DApr13
Web Source S190:11:www Seeed Studio Forum: Wio Terminal by Seeed Studio on 2023DApr13
Web Source S190:12:www Wio Terminal -SDCard py by scruss at GitHub on 2022LNov01
Web Source S190:13:www Grove-Temp & Humidity Sensor (SHT31) from Seeed Studio on 2018FJun01
Web Source S190:14:www SHT31 Datasheet (zipped) from Seeed Studio on 2022EMay16
Web Source S190:15:www (Article 143) Figure 3 "Above PiR2A2 Main Components Layout (to scale)" on p12 by David Cole on 2020 F Jun 19
Web Source S190:16:www Comprehensive List of PiR2D references by David Cole on 2023 D Apr 14
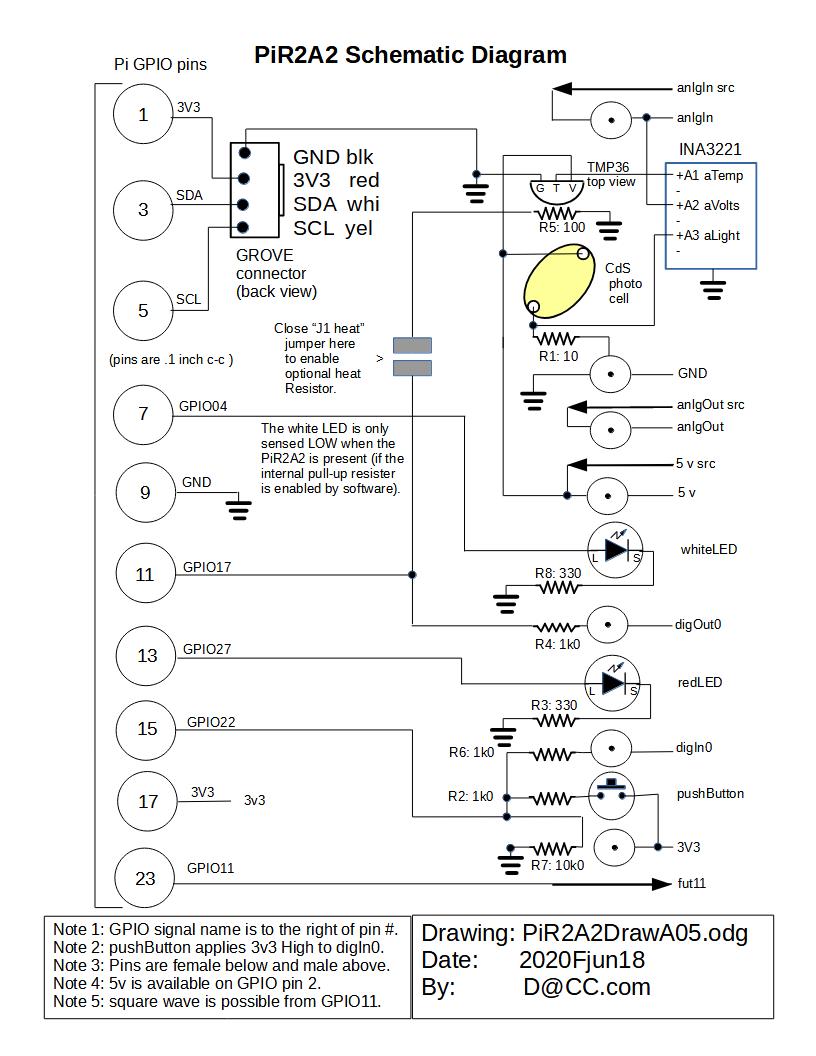
Web Source S190:17:www PiR2A2DrawA05.jpg by David Cole on 2020 F Jun 18
Web Source S190:18:www Adafruit GPIO Expander Bonnet (4132) at Mouser Electronics on 2023 D Apr 14
Web Source S190:19:www T08072 Operators Manual at Home Depot on 2023 G Jul 10
Web Source S190:20:www Sintron 50 amp Generator Power Inlet Box (CAD $ 68.14) at Walmart on 2023 G Jul 10
Web Source S190:21:www Firman T08072 Tri Fuel Generator Notes at Walmart on 2023 I Sep 25

WebMaster: Ye Old King Cole

There is a way to "google" all the part-numbers, words and phrases in all my articles.  This 
search limits itself ONLY to my articles. Just go to the top of "ePC Articles by Old King Cole".
Click here to return to ePC Articles by Old King Cole

Date Written : 2023 D Apr 06
Last Updated : 2023 J Oct 11

All rights reserved 2023 by (c) ICH180RR

saved in E:\E\2022\DevE\MyPagesE\Globat\ePhotoCaption.com\a\190\190.html
backed up to ePhotoCaption.com\a\190\190_2023DApr09.html
Font: Courier New 10 (monospaced)
/190.html