WioIXkb V 01.0

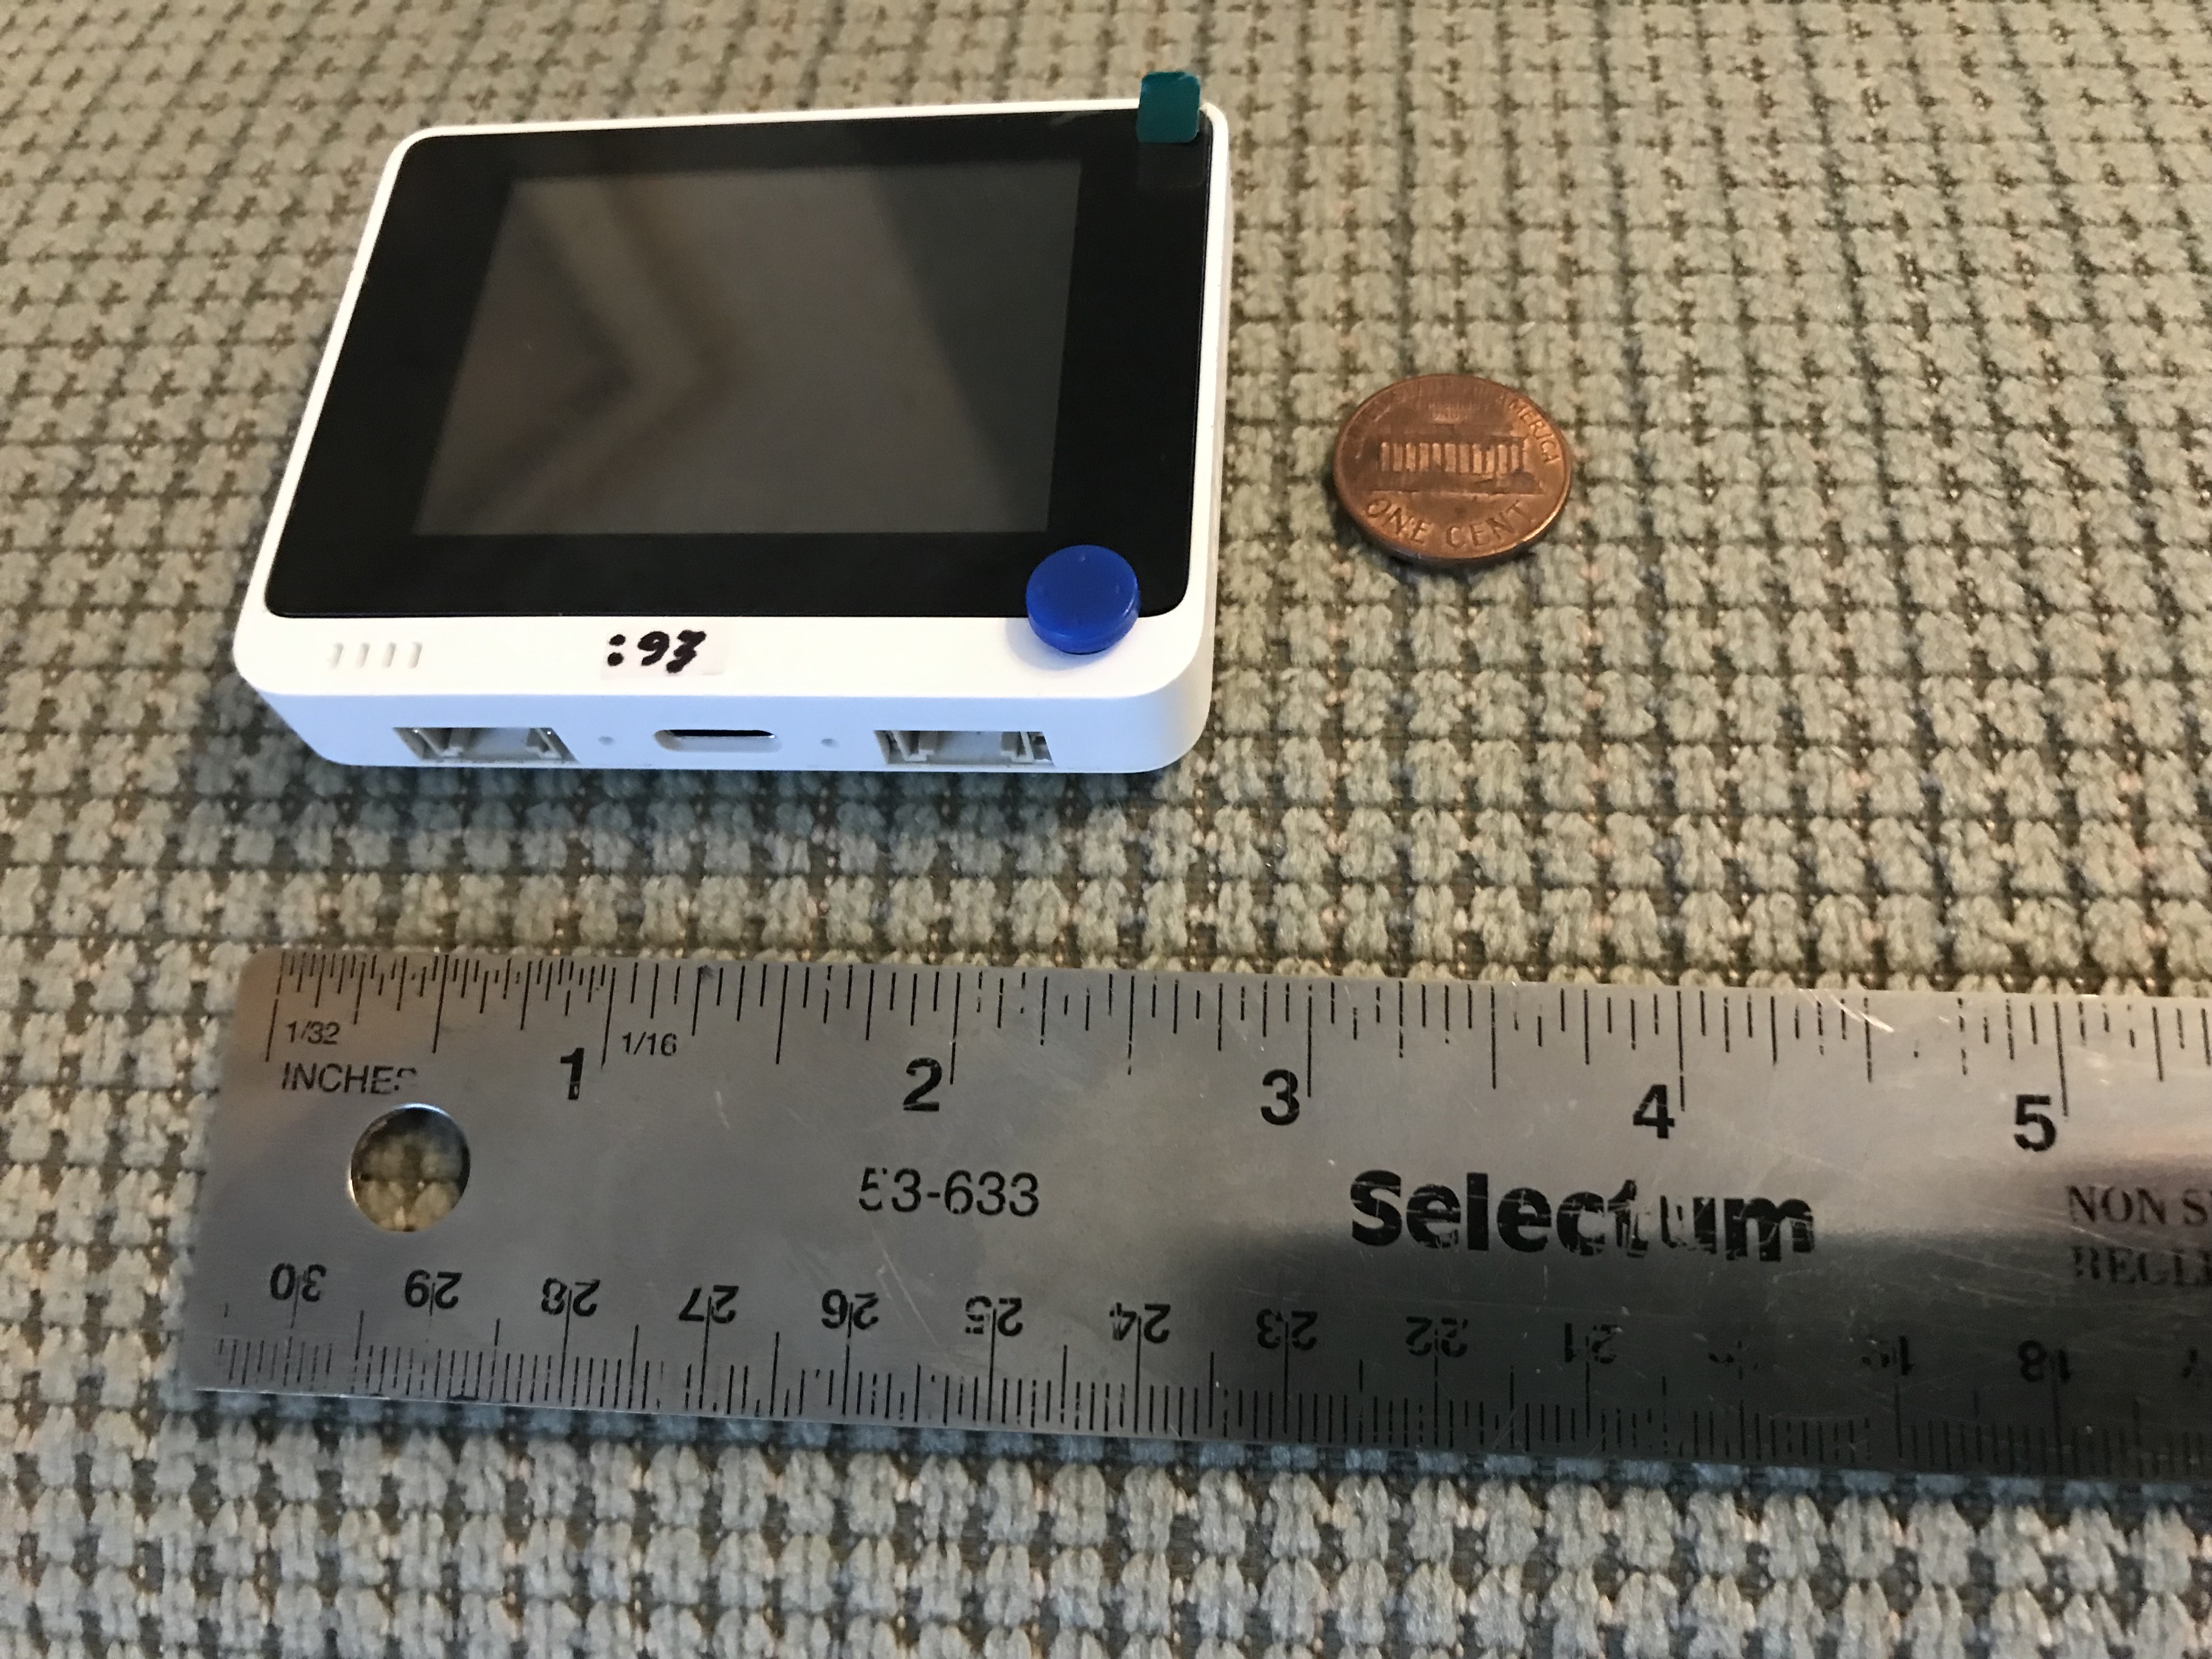
WioTerminal

|
(To enlarge .....Click it)
WioIXkb V 01.0 |
(To enlarge .....Click it)
WioTerminal |
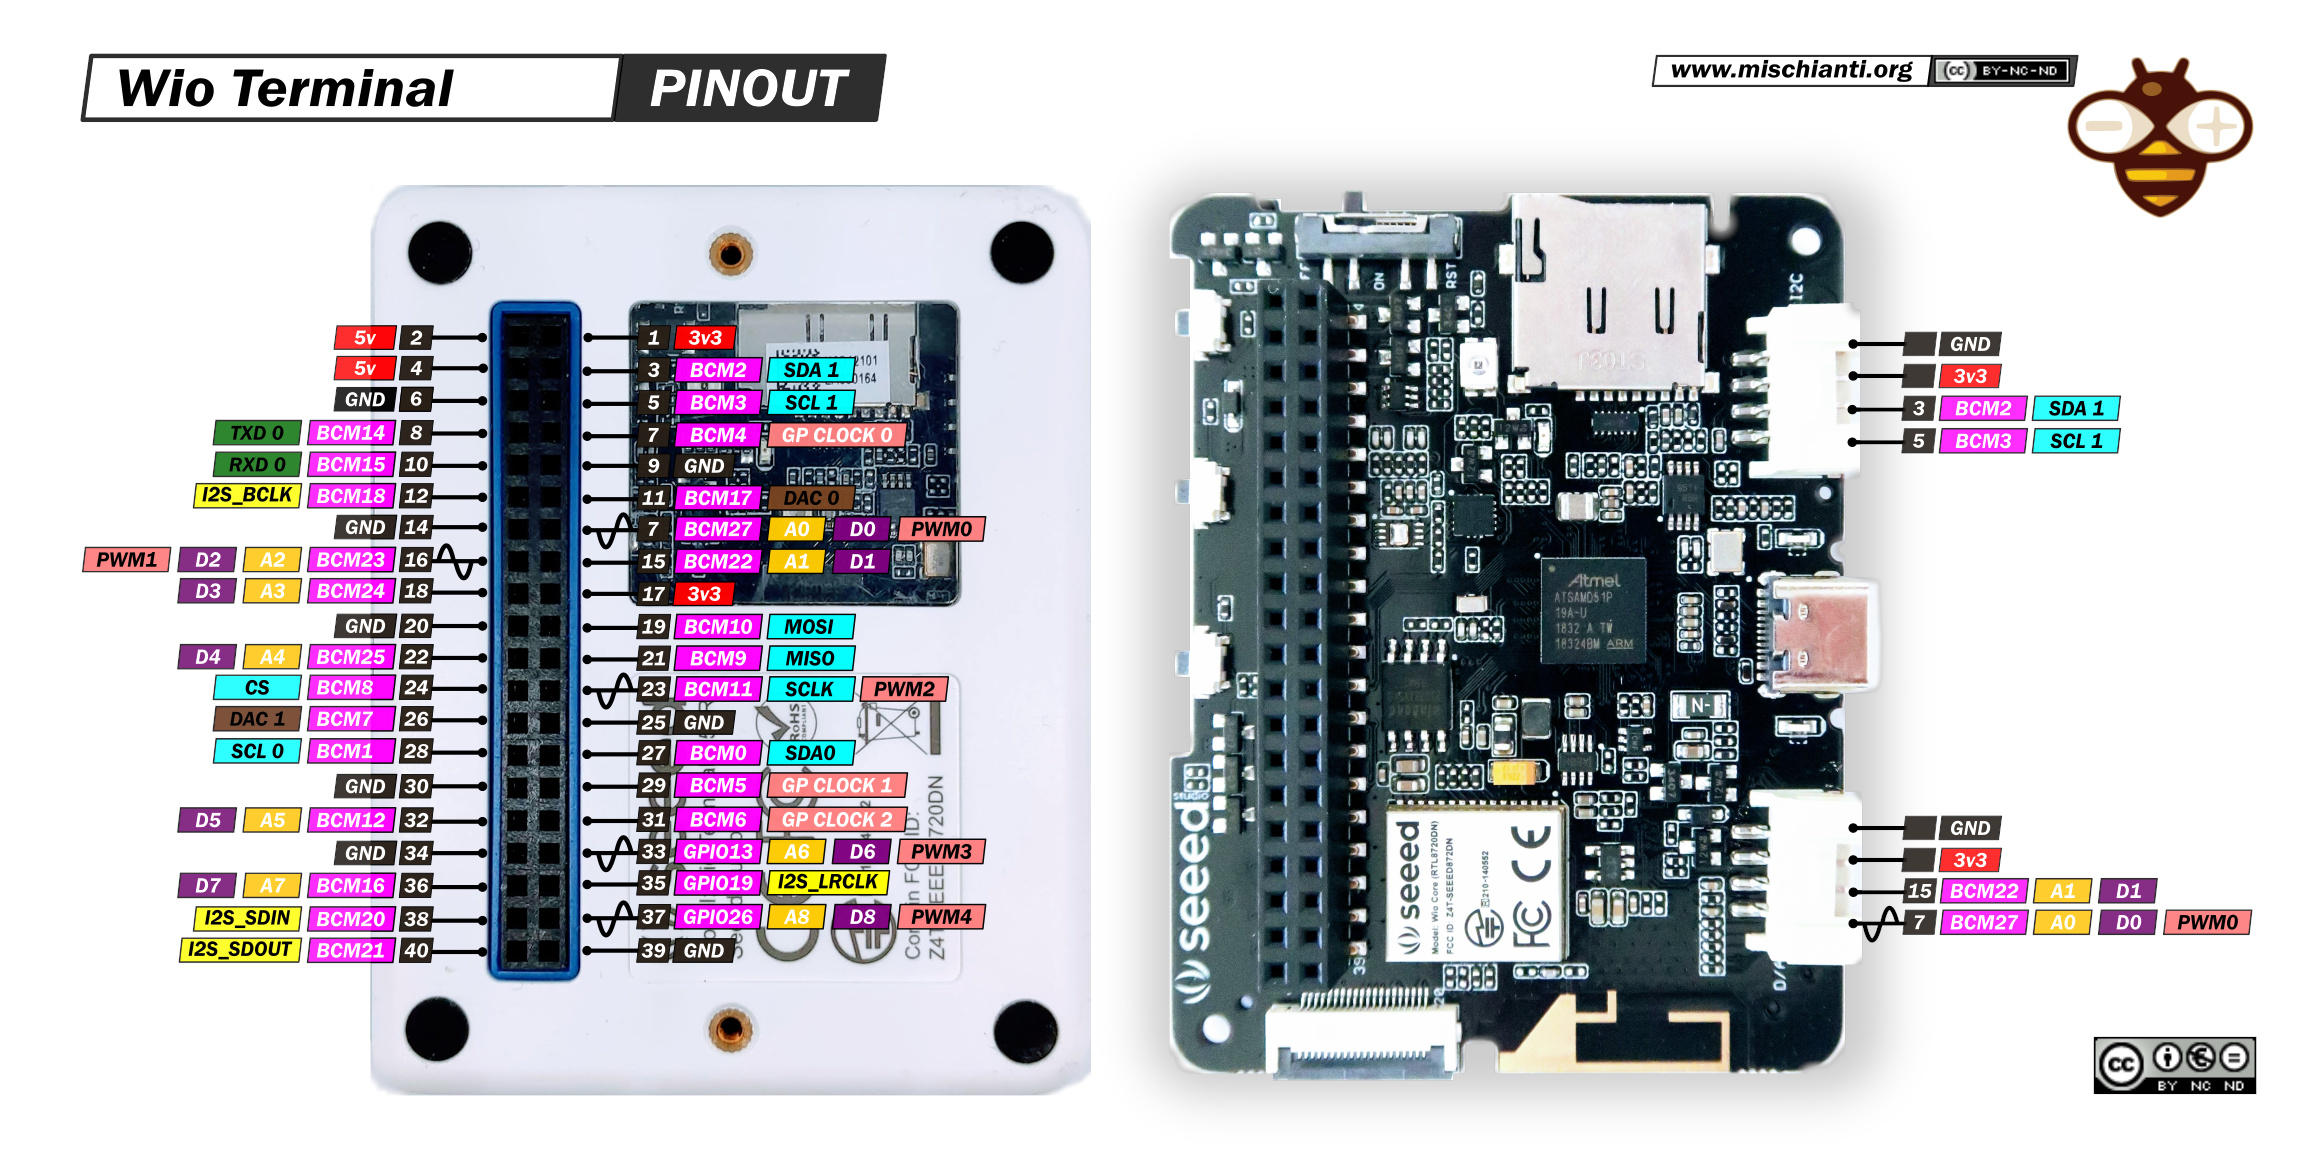
188 Wio: mainWio CLI (188.html)
Table of Contents
Introduction
PinOuts on the Wio Terminal
The Simplest WioTerminal CLI MicroPython Program
Limitations of the WioTerminal (without mainWio)
Splash Screen
Libraries
Commands Provided By mainWio
Addressing the Limitations of the WioTerminal (by using mainWio)
MicroPython Programs included with mainWio
GMT (Greenwich Mean Time) or local time simply neeeds the proper offset
Creating an Improvised Python Program
mainBuild first, then mainWio[time-stamped], then main.py
Contents of the WioTerminal internal flash-drive
Conclusion
End
0         1         2         3         4         5
012345678901234567890123456789012345678901234567890123456
Button-1    Button-2      Button-3
$$pgdn                                      # @Rec#000 00
$$CTRL     -C             #cancel-program  mm:ss 39:22 01
$$help     -D             #CTRL-pgdn                   02
$$ls       def/           blueLedBlink.py              03
$$more     dev/           blueLedOn.py                 04
$$pgup     txt/           blueLedOff.py                05
$$pyi($)   py/            pyiSubmenu.py ************** 06
$$refresh  submenuI/      setClock.py   * mainWio CLI* 07
$$restart  (Srow)                       ************** 08
           txt/mainWio.txt                  UP         09
           txt/minicom.txt           LEFT ENTER RIGHT  10
                           uJoyStick:      DOWN        11
                                                       12
 main.py (mainWioV00o0.py) WioTerminal MicroPython CLI 13
 running on device: WioTerminal                        14
/txt/mainWio.txt by D@CC of ICH180RR on 2023CMar31     15 (next page)
                                                       16
minicom and REPL
$ minicom -o -D /dev/ttyACM0    #starts minicom on the main USB port (to the WioTerminal)
CTRL-A z                        #displays the minicom parameters
W                               #toggles the minicom "wordwrap" parameter ON
CTRL-C                          #starts REPL (which runs single Python statements: >>>)

>>> help()                      $ MicroPython help
>>> help("modules")             $ Adafruit module library list

>>> import os                   $import the os library from MicroPython
>>> os.listdir()		$ lists the directory of the WioTerminal flash-drive
>>> dir(os)                     $ lists the methods in the os library
>>> help(os)                    $ lists the functions in the os library
>>> import time                 $get the time library
>>> seconds=time.time()         $ get elapsed (not Unix) time (in seconds)
>>> print(seconds)              $ prints out the time
>>> gmTime=time.localtime()     $ get Greenwich Mean Time version of elapsed time)
>>> print(gmTime)               $ print Greenwich Mean Time

>>> import RTC                  $ real time clock ?
>>> help(RTC)                   $ ???
>>> dir(RTC)                    $ ???

>>> import board                $get WioTerminal board library
>>> help(board)                 $ list the board's functions
>>> help(board.BUZZER)          $ shows that the BUZZER is controlled simply by a pin
>>> dir(board)                  $ lists the methods in the board library

>>> CTRL-P                      $ does nothing in this MicroPython (on the Wio Terminal)
>>> CTRL-L                      $ clear the screen
>>> CTRL-A                      $ moves the cursor to the start of the line
>>> CTRL-H                      $ BS  (on a 2-ary line back-Tabs to accept a Enter to execute)
>>> CTRL-H                      $ ends secondary prompt (Hit Enter to 1-ary & 2-ary statements)
>>> CTRL-I                      $ pastes something
>>> BS                          $ on a 2-ary line back-Tabs to accept an Enter to execute...

>>> from math import *          $math library
>>> help('math.pow')            $ lists many python functions that use the type of object listed

                                $compound statements etc
>>> for i in range(4):print(i)  $ then hit Enter twice to run this compound statement
                                $end each line with " \ " for line continuation
>>> for i in range(4): \
...     print(i)                $ then hit Enter twice to run these 2 statements  (this works)
                                $ but
>>> for i in range(4):          $ start a loop, hit Enter, get secondary prompt, then populate the for loop
...     print(i)                $ then hit Enter twice -> Error Doh? This is supposed to Work
                                $ so. . do this
>>> for i in range(4):          $ start a loop, hit Enter, get secondary prompt, then populate the for loop
...     print(i)                $ then hit CTRL-H then Enter runs the for loop
                                $ success
finally . . .
>>>CTRL-D                       $restarts the WioTerminal
pgdn    Displays the next page (of a long text file or program).
refresh Displays the previous screen (that resulted from executing the previous command)
help    Displays the help file for mainWio.py (usually followed by the refresh command.)
more    Displays a full text file (or program) using multiple screens.
          Hit Enter (on the uJoyStick) to view each next page.
pgup    Displays the previous page (of a long file or program).
ls      Lists the contents of a directory (a folder), "ls" is more powerful than "dir".
CTRL    Aborts a program (when used with the first parameter of "-C").
          Any function/(improvised program) that monitors the button/keys can be
          aborted in this manner.
boot    Reboots the WioTerminal and/or restarts the mainWio program from scratch.
pyi($)  Runs an improvised copy of a .py Python program (requires a chargeable upgrade).
          See the heading "Conclusion" for details about purchasing the pyi($) code etc
          which is delivered on a 4GB uSD card.
restart Restarts mainWio.py, which can display all the button command lists, without clearing
          its main internal Python Lists (such as cmdHistoryList & grepResultList)
Efforts have been taken to emulate Linux commands faithfully (although many parameters are not supported).
-no Keyboard, no Mouse

The mainWio.py program uses the available WioTerminal switches (its 3 buttons and uJoyStick) to select
text that appears on the screen instead of reading from a keyboard.  This text can even come from
text files stored on the WioTerminal


-MicroPython programs (.py) cannot be run "as is" on the WioTerminal

Most Python programs can be slightly modified to run as a Python function.  This modification is
said to "improvise" the .py program. The mainWio program is modified to run a copy of each "improvised Python
program".  These improvisations are created each time the mainWio program is rebuilt by the mainBuild program.
The building process is usually done an a computer that can write to the internal flash drive of the WioTerminal.
The Python programs in the py/ folder are ALL improvised at this time and are all prepended (to the mainWio
code by the mainBuild.py program). (Running improvised Python programs is a feature that must be purchased.
For more information, see the heading "Conclusion".)


-the RTC (RealTimeClock) is not automatically set upon startup

The Real Time Clock in the WioTerminal is normally used to show the elapsed time of the current mainWio session.
A program (setClock.py) is included in mainWio so that the time can be set upon start-up by the user. Once
this is done the "clock time" is displayed instead of "elapsed time".


-locally-stored functions (eg def .....) cannot be imported

If MicroPython functions are stored on the internal flash drive using their function name with an
extension of ".def", the mainWio program will look for them in the /def folder. The Python programs
in the def/ folder are ALL also prepended to the mainWio program at mainBuild time (when the pyi($)
command is purchased). More about this is said later.


-Python programs written solely for the WioTerminal will not run on a Raspberry Pi.

Debugging of the Micro Python programs written soley for the WioTerminal cannot be easily done
if run on another computer.  This is because non-WioTerminal computers, such as a Raspberry Pi,
do not have 3 buttons nor a uJoyStick.  However, the functions written for the mainWio program
are designed to determine whether they are running on a WioTerminal or a Raspberry Pi device.  If the
device is a Raspberry Pi, the normal keys on a true keyboard can be used. The equivalent keys
are:

WioTerminal   Computer (eg
buttons &     RaspberryPi)
uJoyStick     Key
-----------  ---------------
LEFT          Left-Arrow
RIGHT         Right-Arrow
UP            Up-Arrow
DOWN          Down-Arrow
CENTER        Enter
BUTTON-1      "!" (ie Shift-1)
BUTTON-2      "@" (ie Shift-2)
BUTTON-3      "#" (ie Shift-3)

If these Shift keys do not correspond to the keyboard on the computer (eg a Raspberry Pi), be sure to use
the "!", "@" and "#" keys,  or modifiy the source code for the mainWio.py program.  This source will be
available.  Any functions, such as "time.sleep()" that might be a little different can also be made
device-dependant in the same manner.


-most available programs for the WioTerminal are written in C/C++ or CircuitPython (not MicroPython).

All programs for the mainWio are compatible with MicroPython and Thonny, not with CircuitPython nor C/C++.
It is possible without mainWio to run modified CircuitPython programs on the WioTerminal, but the world
of MicroPython programming becomes much closer through the use of mainWio.  Debugging mainWio programs
is greatly simplified by using other computers attached to the WioTerminal.


-support for the uSD card slot is not readily available.

A future version of the mainWio program will support the uSD card on the WioTerminal.


-programs running on the WioTerminal are not permitted to write to its internal flashdrive

This is both an advantage and a limitation.  The advantage is that the user of a WioTerminal cannot
break the WioTerminal when running it in standalone mode.  A working WioTerminal does not degrade.
But this limitation is relaxed by writing to a uSD card in the uSD slot of the WioTerminal.  So
results of any programs (or the programs themselves) can be written to the inserted uSD card.
For example, the results of a major grep or any Python List can be written to the uSD card.
The mainWio keeps a record of all commands (and) keystrokes for each mainWio session.  This file
can also be saved to an inserted uSD card

End of "Addressing the Limitations of the WioTerminal"
keyQ=["D","i","r","/r"] #Enter is represented by "/r"
secDelay=1
device="RPi"

putChar(keyQ,device,secDelay)


# the putChar() function needs to be called once by the main program
def putChar(keyQ):
    isOK = True
    while isOK :
        isOK,strMsg=qFIFO("Append",keyQ,device,secDelay)
        if not isOK :
            if strMsg =="CTRL-C":
                print("CTRL-C caused program abort")
            else:
                print("Error strMsg:",strMsg)
            #if end
            break   #breaks out of the while loop
        #if end
    #while end
#def end

#The program (above) reads the next character and appends it
# to the qFIFO.  It sets isOK=True [and strMsg=char (for debugging purposes only)]
#If a CTRL-C is entered, isOK is set False and
#the strMsg ="CTRL-C". If any error occurs, strMsg = "Error"
#and isOK is set False.
nextChar = getChar(keyQ,device,secDelay)

def getChar(keyQ,device,secDelay):
    isOK,strMsg = qFIFO("Pop",keyQ,device,secDelay)
    if isOK :
        charNext= strMsg
    else :
        print("Error strMsg:"+strMsg)
    #if end
    return charNext
#def end
The net result is that in case of error, the error message will be printer
If no characters are in the keyQ, the qFIFO function hangs in a loop waiting for
characters to arrive.
Whenever characters are available in the keyQ, the next character is
returned as strMsg as rapidly as possible.
# Python code to demonstrate Implementing
# Queue using list
queue = ["Amar", "Akbar", "Anthony"]
queue.append("Ram")
queue.append("Iqbal")
print(queue)

# Removes the first item
print(queue.pop(0))

print(queue)

# Removes the first item
print(queue.pop(0))

print(queue)
The output is:['Amar', 'Akbar', 'Anthony', 'Ram', 'Iqbal'] Amar ['Akbar', 'Anthony', 'Ram', 'Iqbal'] Akbar ['Anthony', 'Ram', 'Iqbal']
mainBuild.py     This program creates a flashable copy of main.py (from mainWio.py) including .def
                 functions and improvised copies of the .py programs.  It should be run on an
                 external computer, such as a Raspberry Pi. The resulting main.py file etc can be
                 flashed to the WioTerminal.
blueLedOn.py    This program turns ON the tiny blue Led located on the bottom edge of the WioTerminal
blueLedOff.py   This program turns OFF the tiny blue Led located on the bottom edge of the WioTerminal
blueLedBlink.py This program blinks ON/OFF the tiny blue Led located on the bottom edge of the WioTerminal
                This program hangs in an infinite loop that can be stopped by selecting the command
                 "CTRL -C" then hitting Enter using the buttons on the WioTerminal.
setClock.py     This program enables the user to set the Date/Time on the WioTerminal.  The current
                 date/time will replace the elapsed time on the splash screen of the mainWio program.
#WioClock_v01.py
# display date/time clock
# after asking the user for the current local date/time in Unix_seconds
def setLocalDateTimeCorrectionForCurrentLocalTime(currentLocalTime_UnixSeconds,device):
    #print("in setLocalDateTime....")
    #print("currentLocalTime_UnixSeconds entered was:",currentLocalTime_UnixSeconds)
    #print("Date Time Now:",time.localtime(currentLocalTime_UnixSeconds))
    #print("Date Time Now entered:",time.ctime(currentLocalTime_UnixSeconds))
    timeRTC_UnixSeconds = time.time()
    #print("timeRTC_UnixSeconds:",timeRTC_UnixSeconds)
    if device=="WioTerminal":
        print("timeRTC_DateTime:",time.ctime(timeRTC_UnixSeconds))
    else :
        timeCorrection_UnixSeconds = currentLocalTime_UnixSeconds - timeRTC_UnixSeconds
    #if end
    #print("timeCorrection_UnixSeconds:",timeCorrection_UnixSeconds)
    return timeCorrection_UnixSeconds
#def end
def localDateTime(timeCorrection_UnixSeconds,device):
    #print("in localDateTime")
    localTime_UnixSeconds= time.time()+ timeCorrection_UnixSeconds
    #print("localTime_UnixSeconds+:",localTime_UnixSeconds)
    #localTime_UnixSeconds= time.time()- timeCorrection_UnixSeconds
    #print("localTime_UnixSeconds-:",localTime_UnixSeconds)

    if device=="WioTerminal":
        localDateTime = time.localtime(localTime_UnixSeconds)
    else:
        localDateTime = time.ctime(localTime_UnixSeconds)
    #if end
    #print("localDateTime:",localDateTime)
    return localDateTime
#def end

import time

progName="WioTerminal_v01_i"
device="WioTerminal"
timeRTC_UnixSeconds=float(time.time())
print("timeRTC_UnixSeconds:",timeRTC_UnixSeconds)

if device=="WioTerminal":
    dateTimeRTC=time.localTime(timeRTC_UnixSeconds)  #convert time.time to date & time
else:
    dateTimeRTC=time.ctime(timeRTC_UnixSeconds)  #convert time.time to date & time
#if end
#dateTimeRTC=1680402493.0272472
print("localClock (without correction):",dateTimeRTC) #print it out

#                   INPUT
timeNow_UnixSeconds=float(input("Enter localTime (in Unix seconds)~1680499000 ? "))
#
if device=="WioTerminal":
    dateTimeEntered=time.localTime(timeNow_UnixSeconds)  #convert time.time to date & time
else:
    dateTimeEntered=time.ctime(timeNow_UnixSeconds)  #convert time.time to date & time
#if end
print("dateTimeEntered:",dateTimeEntered) #print it out
#print("a")
#timeCorrection_UnixSeconds = timeNow_UnixSeconds - timeRTC_UnixSeconds
#print("timeCorrection_UnixSeconds wo function:",timeCorrection_UnixSeconds)
#print("b")
timeCorrection_UnixSeconds=setLocalDateTimeCorrectionForCurrentLocalTime(timeNow_UnixSeconds,device)
#print("timeCorrection_UnixSeconds w  function:",timeCorrection_UnixSeconds)

while 1:
    clockNow=localDateTime(timeCorrection_UnixSeconds,device)
    print("****************************")
    print("clockNow:",clockNow)
    time.sleep(5)
#while end


#end of localClock.py
#end of WioClock_v01.py
#/WioClock_v01.py
The resulting program (above) named "main.py" can be downloaded from Source 06 as a .txt file
(to make it easy to download to an RPi). It can be copied to a WioTerminal (in flash mode)
as the main.py program. When the WioTerminal is rebooted, this main.py program will print . . .
begin program:main.py
improvising: BlinkBlueLed_01.py
named:       BlinkBlueLed_01_i.def
by calling:  BlinkBlueLed_01()
end of main.py
. . . and the blue led will start blinking. This is because the function named "BlinkBlueLed_01()" when invoked (called) will cause it to blink. Note that pin D13 (cited in the above program) can be found in Source 07 as the pin name that controls the (blue) Led in MicroPython for the WioTerminal. Apparently the green Led on the WioTerminal cannot be controlled because it is only ON when the Power is ON.
Volume Name: ArduPy
folder: System Volume Information
          IndexerVolumeGuid
          WPSettings.dat
folder: def/
          anyButton.def
                        monitors & reads the uJoyStick and 3 top buttons
          getDevice.def
	                reports whether this device is  WioTerminal or Pi
          isShow.def
	                provides debugging information if True
          listfromfile.def
	                creates a Python list from a serial file
          splash.def
                        initialises mainWio and creates the Splash screen
          toLCDfromL.def
                        writes a List of a file (multiply paged) to LCD on the WioTerminal
          wioMore.def
	                writes a List (one page of info) to the LCD on the WioTerminal,
                        hitting the Enter Key (uJoyStick) displays the next page (more info).
folder: txt/
          mainWio.txt
          minicom.txt
folder: dev/
          sda
folder: proc/
          cpuinfo
folder: py/
          setClock.py
          mainBuild.py
folder: _builds_/
          mainWio_2023BFeb21_1431.py
          mainWio_2023CMar31_1235.py
          mainWio.py
          pyiSubmenu.py
folder: _mainWioSegments_/
          improviseA.py
          improviseB.py
          mainStub.py
          mainSubmenu.py
ArduPy_wio_terminal_lastest.uf2
INDEX.HTM
INFO_UF2.TXT
main.py
 Exploring the Wio Terminal ( 1:14 min)
by Seeed Studio in 2021
Pi: Wio Terminal for Raspberry Pi (186.html)
by D@CC of ICH180RR on 2023CMar21
mainWio.py from ICH180RR (tba)
by D@CC of ICH180RR on 2023CMar30
187 Wio: WioIXkb : Wio Interface without KeyBoard (187.html)
by D@CC of ICH180RR on 2023CMar31
Exploring the Wio Terminal ( 1:14 min)
by Seeed Studio in 2021
Pi: Wio Terminal for Raspberry Pi (186.html)
by D@CC of ICH180RR on 2023CMar21
mainWio.py from ICH180RR (tba)
by D@CC of ICH180RR on 2023CMar30
187 Wio: WioIXkb : Wio Interface without KeyBoard (187.html)
by D@CC of ICH180RR on 2023CMar31  BlinkBlueLed_01.py (as a .txt file)
by D@CC of ICH180RR on 2023CMar31
improvised BlinkBlueLed_01_i.py (as a .txt file)
by D@CC of ICH180RR on 2023CMar31
main.py (as a .txt file) calling BlinkBlueLed_01()
by D@CC of ICH180RR on 2023CMar31
Find D13 in 186 Pi: Wio Terminal for Raspberry Pi (186.html)
by D@CC of ICH180RR on 2023CMar31
Quick reference for the SAMD21/SAMD51 in micropython-docs.pdf
BlinkBlueLed_01.py (as a .txt file)
by D@CC of ICH180RR on 2023CMar31
improvised BlinkBlueLed_01_i.py (as a .txt file)
by D@CC of ICH180RR on 2023CMar31
main.py (as a .txt file) calling BlinkBlueLed_01()
by D@CC of ICH180RR on 2023CMar31
Find D13 in 186 Pi: Wio Terminal for Raspberry Pi (186.html)
by D@CC of ICH180RR on 2023CMar31
Quick reference for the SAMD21/SAMD51 in micropython-docs.pdf  v 1.19.1 by MicroPython.org on 2022FJun22