Raspberry Pi NOOBS Setup (43.html)

(To enlarge .....Click it)
thumb: My Raspberry Pi 2 with TV monitor
My Raspberry Pi 2 with TV monitor

(To enlarge .....Click it)
thumb: The Raspberry Pi 3 with WiFi
The Raspberry Pi 3 with WiFi

My little $59 PC

In the photo on the left, is a " Raspberry Pi 2 Model B " computer with a 4 core chip and 1 GB of ram.

The actual PC is the tiny Electronics Board just behind the keyboard. A close-up view of the Raspberry Pi 2 Model B circuit board is shown below. In the photo above, notice the red raspberry in the center of the TV. My laptop is only there because I was following the setup instructions on it. Of course, the Raspberry Pi 2 is a fast little machine.

I downloaded the Raspberry software from the UK and copied it into the MicroSD 16 GB camera memory chip. I was also able to use the little PC to read a normal flash drive.

It can play music by uploading the mp3 file to the Google Drive on the "cloud". Then Google can be used to play the music through the speakers on the TV

The photo on the right is the Raspberry Pi 3 Model B that was released in Feb 2016. It includes all of the feature of the Pi 2 B plus WiFi and BlueTooth. Furthermore the processor is faster. But the price is the same.

(To enlarge .....Click it)
thumb: My Raspberry Pi 2 connected
My Raspberry Pi 2 connected

(To enlarge .....Click it)
thumb: The $5 Pi Zero
The US$5 Pi Zero

(To enlarge .....Click it)
thumb: The $5 Pi Zero 2W
The US$15 Pi Zero 2W


Above Photos: the Pi 2 (left) vs the Pi Zero (right)

The leftmost image above is the Raspberry Pi 2 Model B with all its wires and software. I store mine in a box that used to contain a deck of cards. Going clockwise, starting at 7 o'clock, the various wires connect the keyboard, the mouse, the Internet, the TV and the power supply. The Raspbian software, which is the Linux Operating System, is in the Micro SB memory card which is so small that you can hardly see it. This tiny black Micro SB memory card is barely visible. Part of it is sticking out of the middle of the right hand side of the circuit board, just above the glowing LEDs.

These photos were taken early in 2015. Recently, in January 2016, I purchased the most recent version of the Raspberry computer, the Pi Zero. It is half the size of the Raspberry Pi 2 Model B and only costs $5. The keyboard, mouse and power supply each cost more than the Pi Zero. The Pi Zero in the center image above has some limitations in its connectability due to its size which is less than half the size of the Pi 2. But I was able to run the Raspbian Linux software using only a mouse (and monitor). Users wishing to acquire a low-cost usable computer to surf the web or to do programming should buy the $35 Raspberry Pi 2 Model B instead. But users wanting to incorporate one or more computers into projects such as a robot or a self-controlled camera will want to use the $5 Pi Zero.

To use the Pi Zero as a programming station, a powered USB hub is necessary which costs more than the Pi Zero itself. Accessing the Internet requires a WiFi Dongle, which costs roughly the same as each of the other components.

In 2022, the Raspberry Zero 2 W was announced. It is shown on the right above.

The Pi Zero 2W is much faster than the Pi Zero. It has Wifi and Bluetooth capabilities. It is faster than the Raspberry Pi 2 and only costs US$15.00. It has fewer connectors than the Raspberry Pi 2 and is in a format the size of the Raspberry Pi Zero.

NOOBS Software Setup

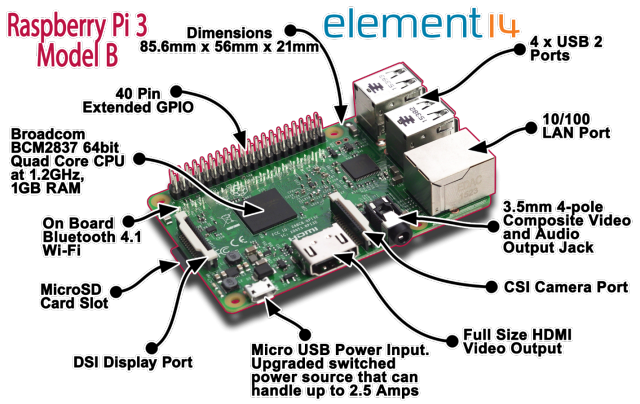
To get started with Raspberry Pi [or Raspberry Pi 2] you need an operating system. NOOBS (New Out Of the Box Software) is an easy operating system install manager for the Raspberry Pi.

How to get and install NOOBS

Until 2022, there were only two ways to download and install the Raspberry Operating System for the first time:. As of 2022 it is possible to flash the operating system image onto a microSDcard using a Raspberry Pi computer that is connected to the Internet. This involves removal of the running microSDcard, and the insertion of a blank microSDcard into the Raspberry Pi. This 3rd method is described in Source 02 in Article 170. The 3 methods are:
-A. Buy Noobs pre-installed on a microSDcard
-B. Create a bootable microSDcard using the detailed procedure shown below
-C. Burn the Raspberry Operating System onto the microSDcard in the Raspberry, via an operational  Ethernet cable (Source 02).

A. Buy NOOBS on a preinstalled SD Card

The easiest way to get NOOBS is to buy an SD card with NOOBS preinstalled, available for £4 at the Swag Store. Alternatively, if you have an SD card (8 GB recommended), then you can download NOOBS for free and install it on your card. [For the Raspberry Pi 2, you should use a 16 GB Micro SD card instead. NOOBS dated after Feb 2, 2015 will work on both the Pi and the Pi 2. But NOOBS dated earlier will only work on the Pi.]

B. Detailed Procedure

  1. Using a computer with an SD card reader, visit the Downloads page.
  2. Click on the Download ZIP button under ‘NOOBS (offline and network install)’, and select a folder to save it to.
  3. Extract the files from the zip.

Format your SD card

It is best to format your SD card before copying the NOOBS files onto it. To do this:

  1. Visit the SD Association’s website and download SD Formatter 4.0 for either Windows or Mac.
  2. Follow the instructions to install the software.
  3. [If you have a Raspberry Pi 2, you will need to insert the Micro SD card into an SD card adapter, so that it can be used as a normal SD card.] Insert your SD card into the computer or laptop’s SD card reader and make a note of the drive letter allocated to it, e.g. G:/
  4. In SD Formatter, select the drive letter for your SD card and format it.

Drag and drop NOOBS files

  1. Once your SD card has been formatted, drag all the files in the extracted NOOBS folder and drop them onto the SD card drive.
  2. The necessary files will then be transferred to your SD card.
  3. When this process has finished, safely remove the SD card and insert it into your Raspberry Pi. [If you have a Raspberry Pi 2, you will need to take the Micro SD card out of the SD adapter and insert the Micro SD card into the Raspberry Pi 2.]

First boot

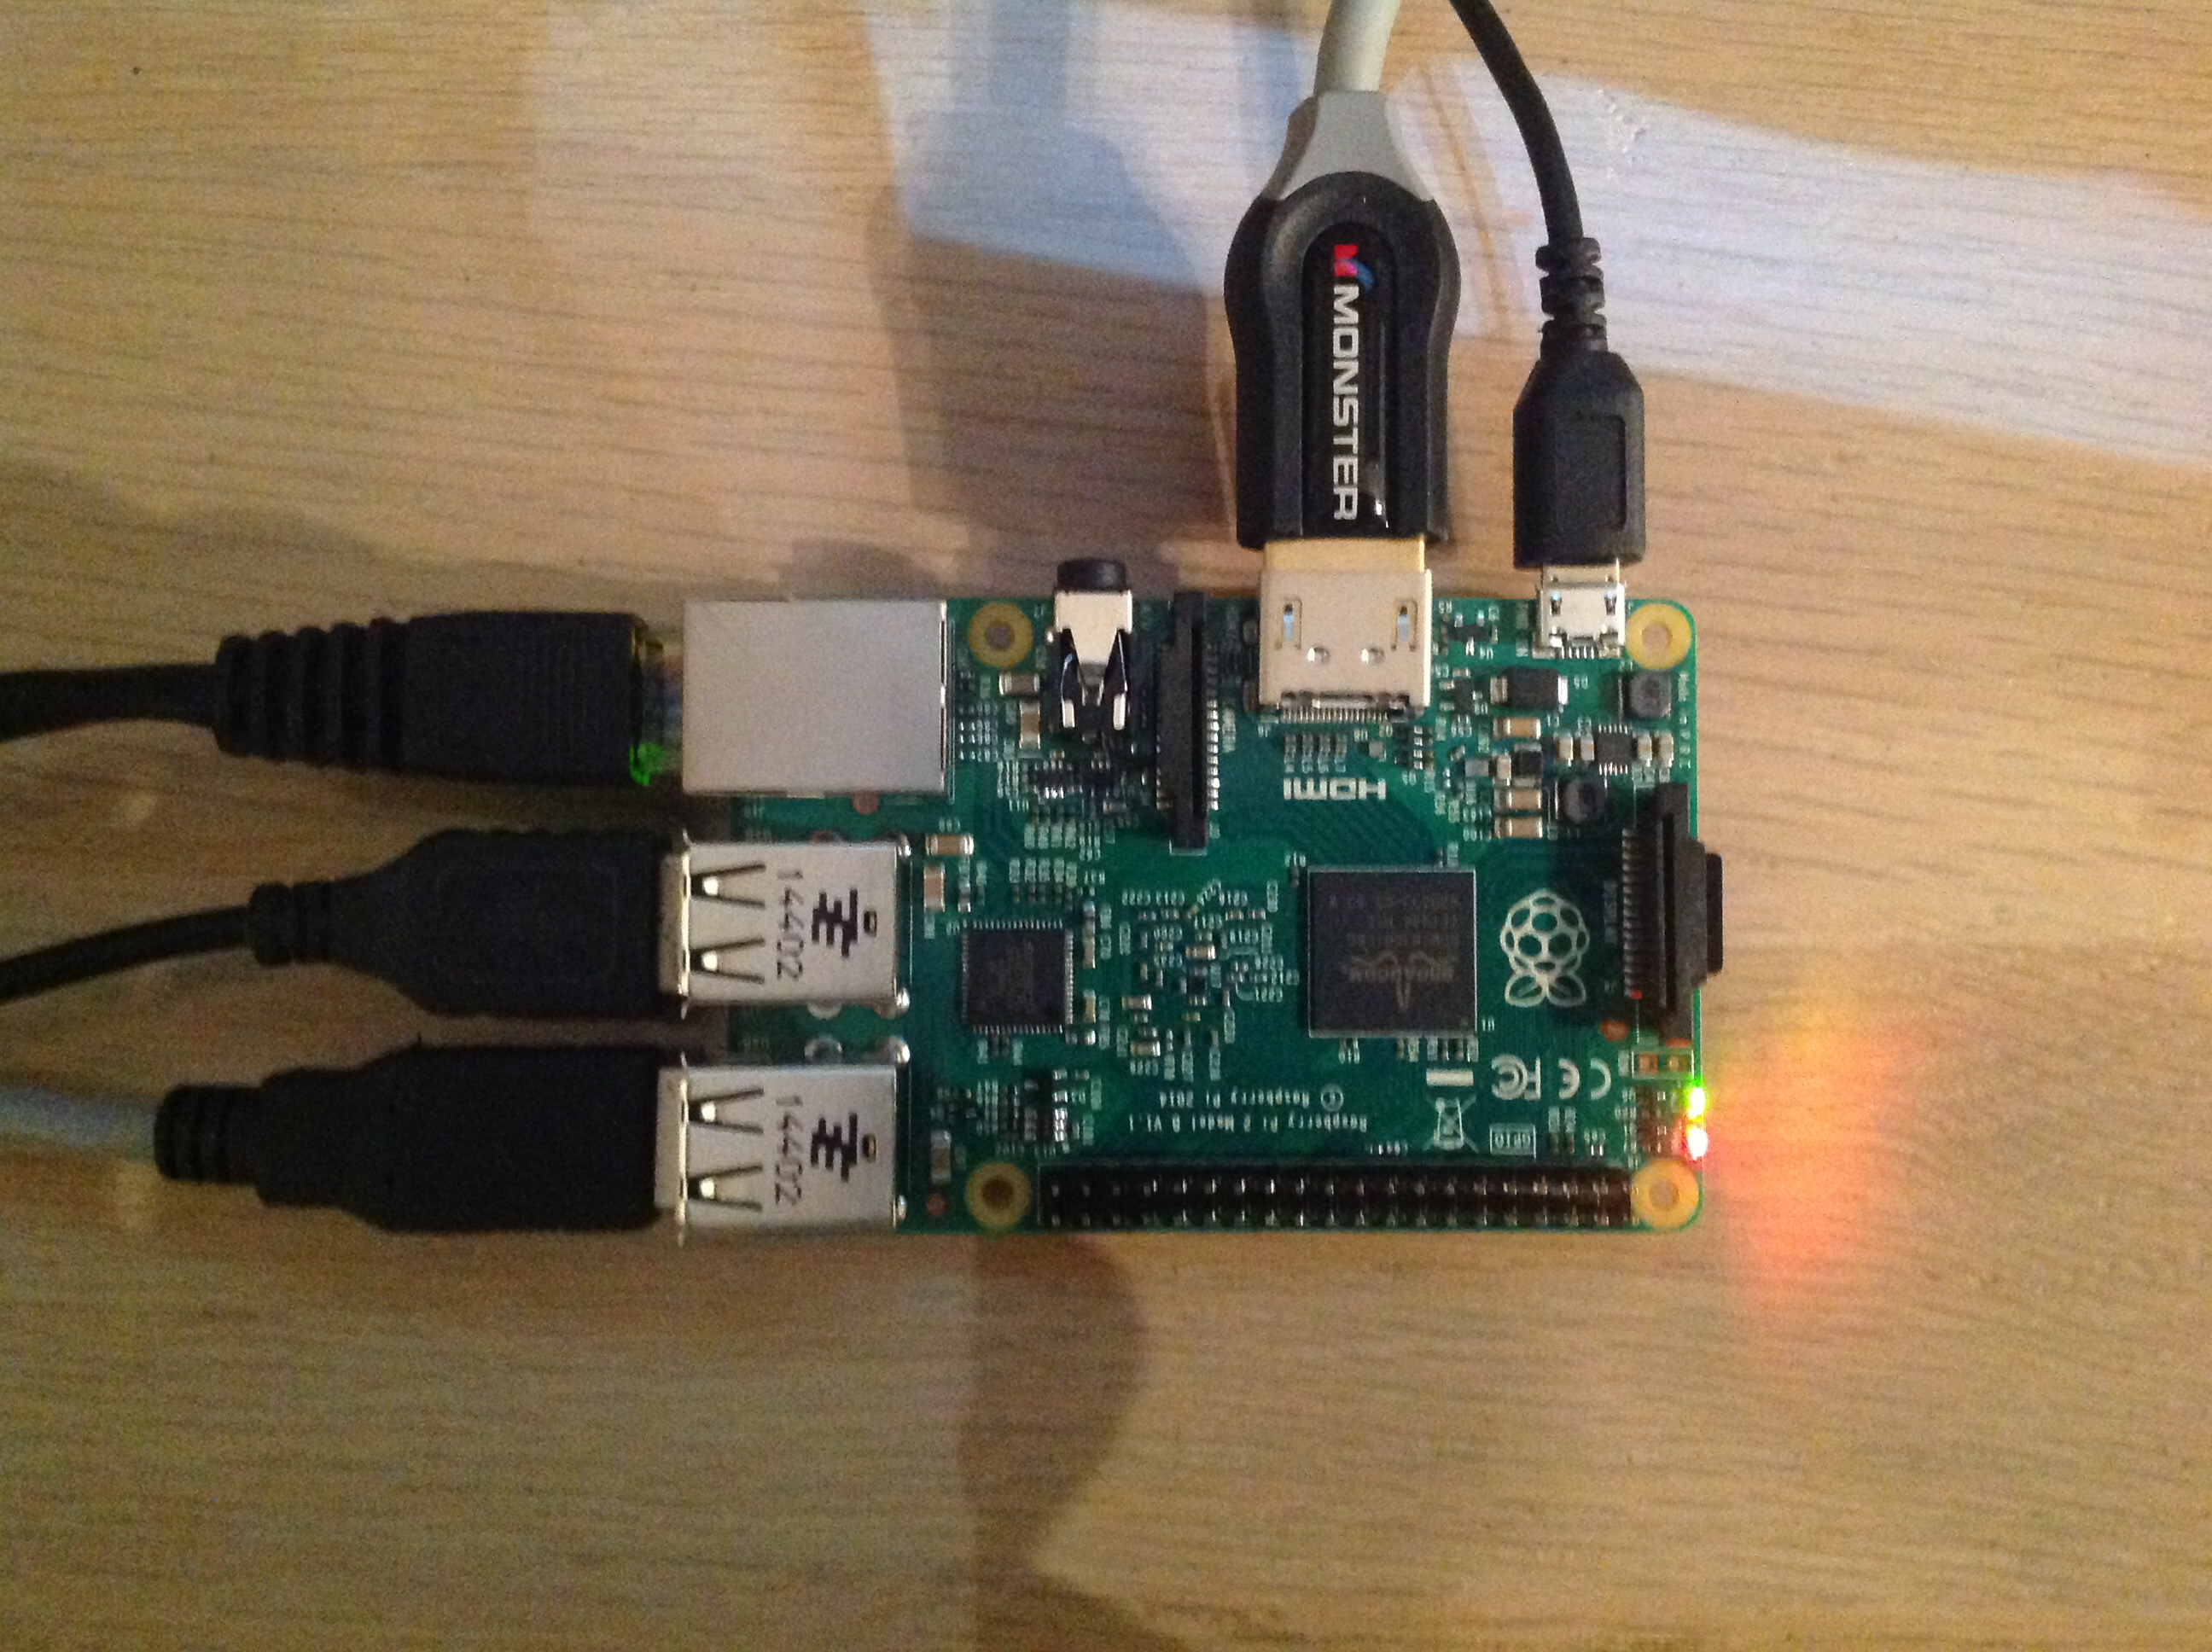
  1. Plug in your keyboard, mouse and monitor cables.
  2. Now plug in the USB power cable to your Pi.
  3. Your Raspberry Pi will boot, and a window will appear with a list of different operating systems that you can install. We recommend that you use Raspbian – tick the box next to Raspbian and click on Install.
  4. Raspbian will then run through its installation process. Note this can take a while.
  5. When the install process has completed, the Raspberry Pi configuration menu (raspi-config) will load. Here you are able to set the time and date for your region and enable a Raspberry Pi camera board, or even create users. You can exit this menu by using Tab on your keyboard to move to Finish.

Logging in and accessing the graphical user interface

The default login for Raspbian is username pi with the password raspberry. Note you will not see any writing appear when you type the password. This is a security feature in Linux.

To load the graphical user interface type startx.

Refer to our documentation for more information.

C. Flash a microSDcard using a Raspberry computer

This third method is described in Source 02. Read more about this in Article 170 in Source 03. This source indicates that the boot loader (that comes in the "ROM" on every Raspberry PC) will soon (as of 2022) be included in every Raspberry Pi computer sold by Raspberry. This will be a game-changer that facilitates the installation of all Raspberry Pi computers. All it needs is an ethernet cable attached to a router and a keyboard attached to the Raspberry Pi.

Click here to return to ePC Articles.

Web Sources

Web Source: S043:01 Noobs-Setup
Web Source: S043:02:www GREAT NEWS: Network Raspberry Install beta test: help required written by Peter Harper of RaspberryPi.com on 2022 B Feb 08
        [WOW: How to copy a Raspberry Image to the empty microSDcard in a Pi-400 directly using an ethernet cable.]
Web Source: S043:03 Useful Raspberry Device Terminal CommandsCreating . . SDcard . . using . . . Ethernet cable

Created: 2015 B Feb 18
Updated: 2022 B Feb 14
[edits for the Pi 2 are by the WebMaster.]
WebMaster: David KC Cole
Name: /NoobsSetupB.html
/43.html